Usage
Add animation files
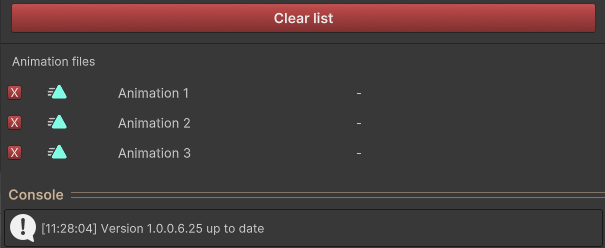
Drop one or more animation(s) on this field to add them to the tool.

All added animations will appear in the list in the lower section of the tool window (you might have to move the console down by dragging the horizontal divider slightly to see it).
By clicking the red X, the animation is removed from the list and will not be edited. The “Clear List” button removes all animations from the tool.
Choose what you want to edit
Let´s say we have following setup
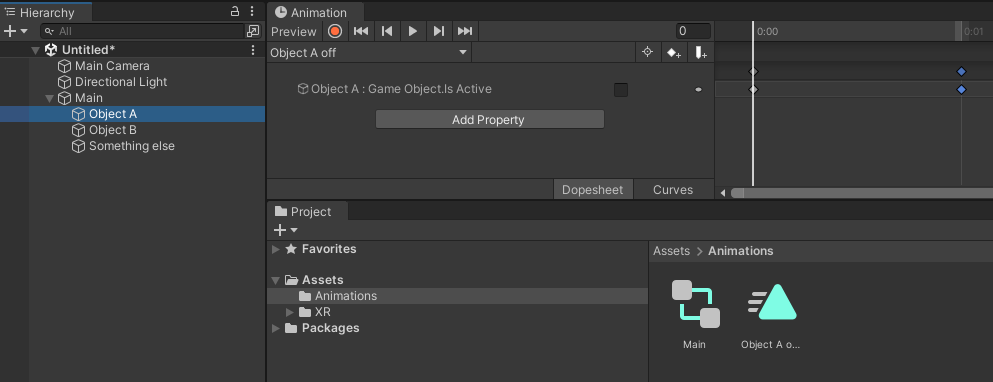
Object A is part of Main. Main has an animator with an animation to turn Object A off.
The tool lets you pick add, remove or replace mode.
In the following, each mode will be explained in more detail.
Since v1.2.0 Unity´s undo system has ben properly implemented and can now be used to revert changes. The tool labels the repathing as "Replace Animation Paths" in Unity´s undo history. Be aware that all changes to all files from the last execution will be reverted.
Replace
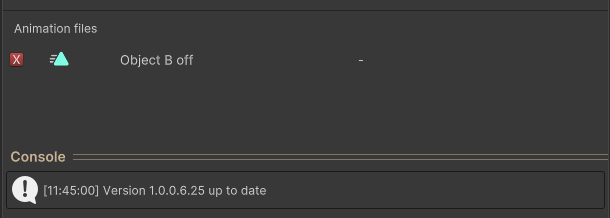
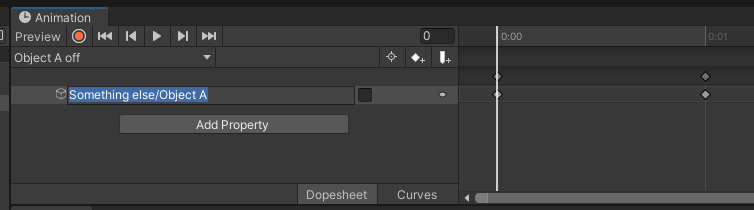
Now assume we duplicate the animation and rename it to Object B off like this

The next step is to change all paths (curves) in this animation so that they point to Object B. This is where the replace feature comes in. But first, make sure the animation you want to edit is actually loaded into the tool by dragging and dropping the Object B off.anim file into the field at the top.
For the replace mode, the “Search for” field indicates the part you want to replace, while the “Replace with” field specifies the text you want to use instead. You can either type the paths in manually (or copy them from your animations) or drag and drop the objects to obtain their paths. In our example, we’ll drag Object A into the “Search for” section—since that is the one we want to replace—and Object B into the “Replace with” section.
The command here would be
"Hei, replace every occurrence of ‘Object A’ with ‘Object B’ for every curve for every file in the list."
With the objects added, it should look like this
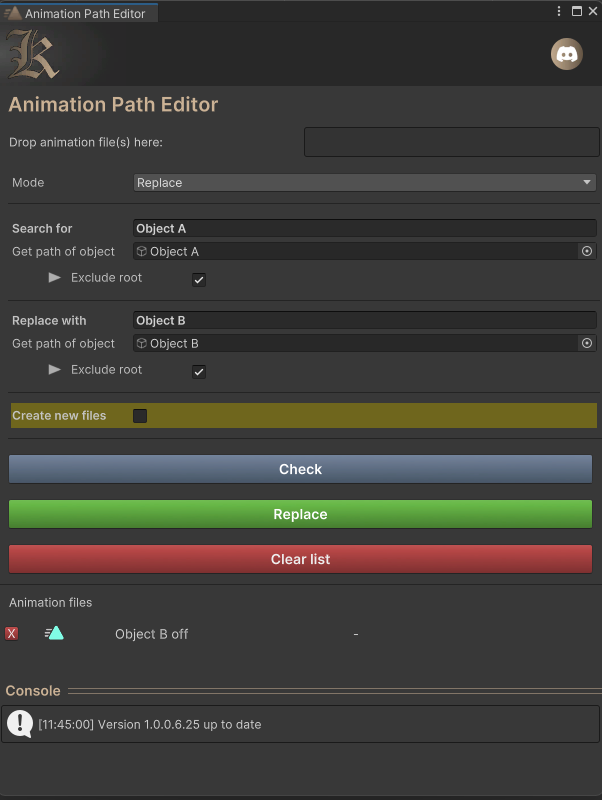
Note that the “Exclude root” option is checked. This option shortens the path by removing the first object from it. This is useful because the animator is located at “Main”, and we don't want “Main” to be part of the path. Animations only need to point to objects within the scope of their animator, meaning the paths are relative from the animator’s point of view. Since “Main” has an animator component, it should not include itself in the path.
Note that “Main” can be your avatar’s root if you're using this tool for VRC avatars.
Also important: the “Create new files” option. If you're unsure of what you're doing, or just want to experiment or test, enable this option. It will create copies of your animation files and apply changes only to the copied versions. The original files will remain unmodified. The new animations will appear next to the originals in the asset browser.
The Check button simulates the changes and tells you how many curves will be modified in each animation. This button does not make any changes—it only simulates the result. The Replace button actually applies the changes and starts the modification process.
So, back to the example. We have two animations for ‘A and B. Both have the same content since the file was copied. Now we tell the tool to look at Object B off.anim and pick every curve that CONTAINS “A” (Search entry) and replace it with “B” (Replace entry).
Check reveals that

After clicking on Replace, the content of Object B off.anim looks like this
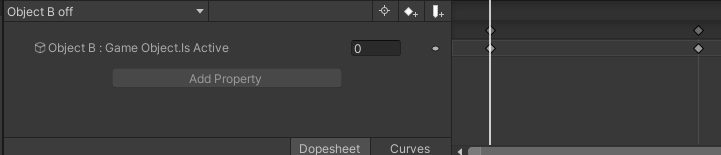
Exactly wat we wanted. “Object A” got replaced with “Object B”.
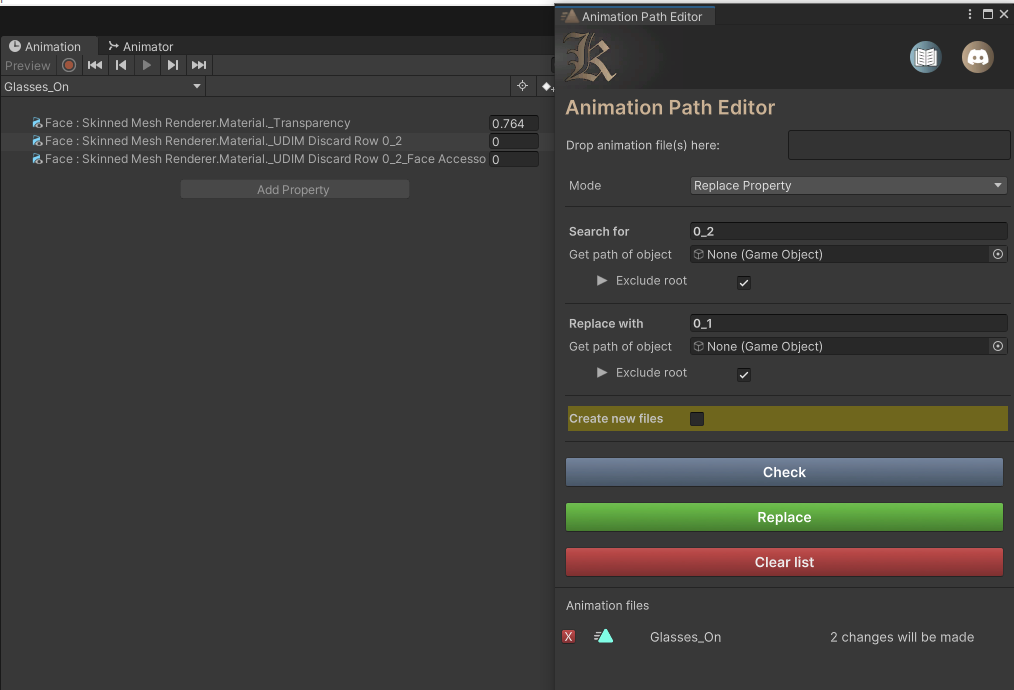
Replace Property (Since version 1.0.2)
This is a special mode, that lets you replace the animated property instead the path.
So for example you changed the UV tiling of a model and now you want do adapt the animations to this change.
Simply select the Replace Property mode and enter what you want to replace, e.g. UDIM Discard Row 0_2 with 0_1
Add
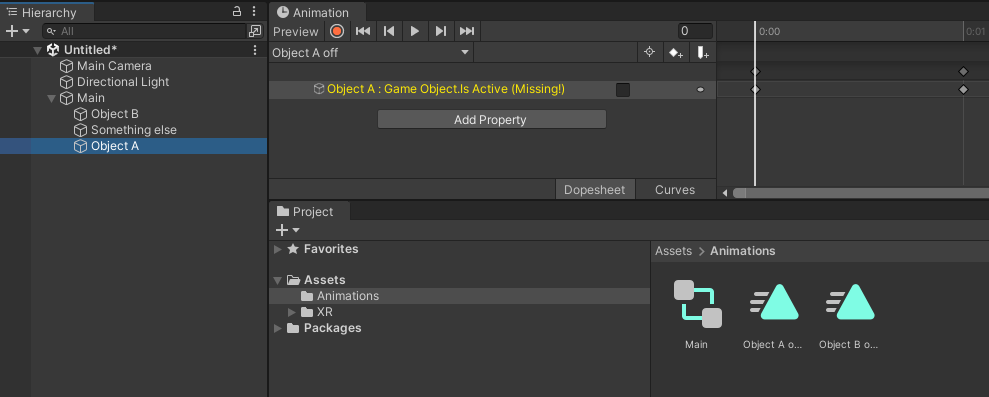
Ok. Now let´s assume we re moving Object A into “Something else”, so the hierarchy looks like this
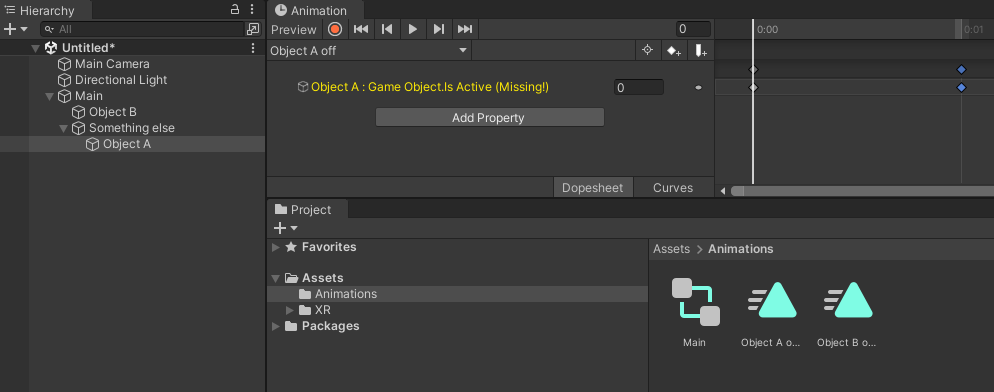
As you can see, Unity immediately tells us that the path to Object A is no longer valid, since it's not at the expected location in the hierarchy. The animation expects the path to be “Object A”, but it is actually “Something else/Object A”. You could use the Replace feature here to change “Object A” to “Something else/Object A”, but in this case, I want to use the Add feature instead. The Add mode simply prepends the specified text to the beginning of animation paths. When you switch to Add, the Search field becomes the Contains field. This allows you to specify that only curves containing a certain phrase should be modified. Essentially, it's a filter. For example, you might say: “I want ‘Something else/’ to be added only to curves that contain ‘Object A’ in their path.” This is especially useful if your animation includes both Object A and Object B (as two separate curves), and only Object A has been moved in the hierarchy. In that case, only Object A’s path needs to be updated.
If you leave the Contains field empty, the text in Append to start will be added to all curves in all animations — so use this option with care.
The command here would be
“Hei, add ‘Something else/’ to the beginning of every curve in every file in the list that contains ‘Object A’ somewhere in its path”.
In our example, it would look like this (note that I removed the Object B off.anim from the tool (little red x) and added the Object A off.anim for this example)
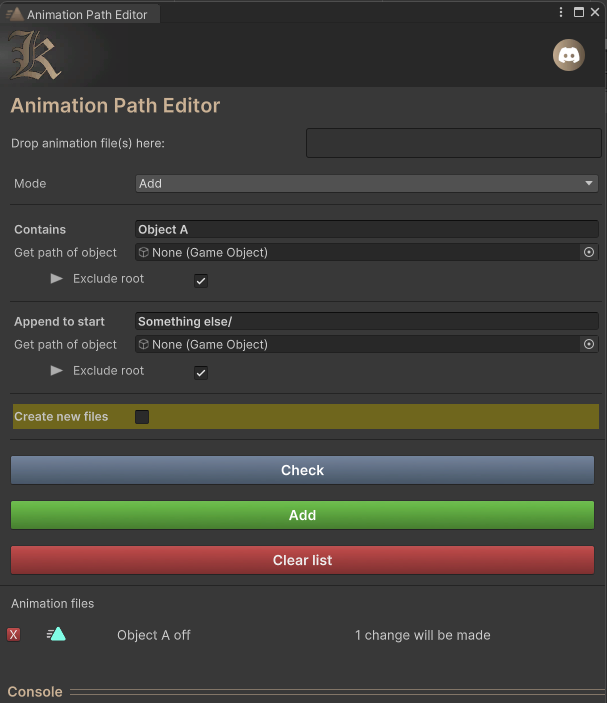
The trailing slash in “Something else/”. You must include it — otherwise the path will become “Something elseObject A”, which is incorrect. This tool works purely with text and does not validate the resulting paths. Ensuring correctness is up to you. (Again, the Create new files option is ideal for testing purposes.)
By clicking Check, the tool will show you that one change is about to be made.
Clicking Add will then apply the modification to the animation curve, resulting in the updated path
Again, exactly what we wanted
Remove
Remove is simple. Like search and replace, remove lets you search and remove.
Again, we have the contains field, that works identically like explained in the Add section (filter curves).
Let´s say we move Object A back like this
The command here would be
“Hei, remove ‘Something else/’ from all paths that contain ‘Object A’” for all curves in all files in the list.
Looking like this in the tool window
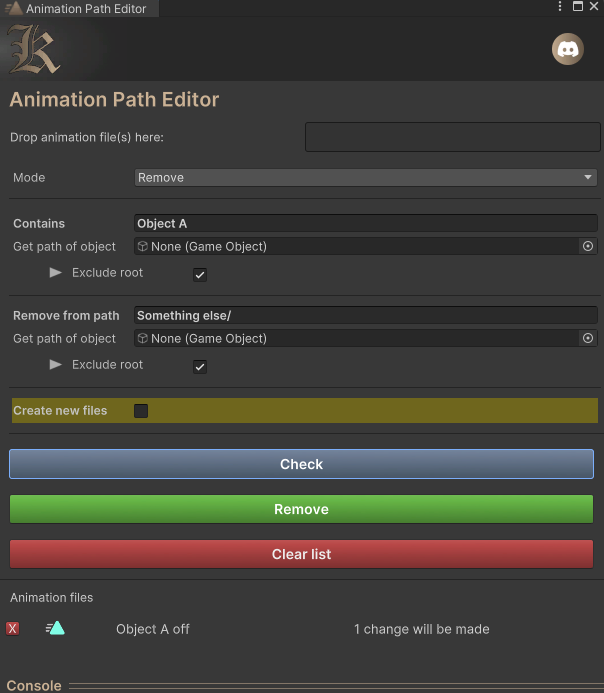
Note that you can also remove specific parts of a path. For example, if you renamed “Something else” to “Something” in the hierarchy, you can simply remove “ else” (note the space before “else”) — and the result will be “Something/Object A”.
As mentioned, this tool operates on a text-based level, so it's important to be mindful of spaces, slashes, and exact naming.
Click on Check -> one change will be made.
Click on Remove and the animation file looks like this
And again, exactly what we wanted
But to be fair, changing one path of one animation is not really a big deal. What if we had something like this
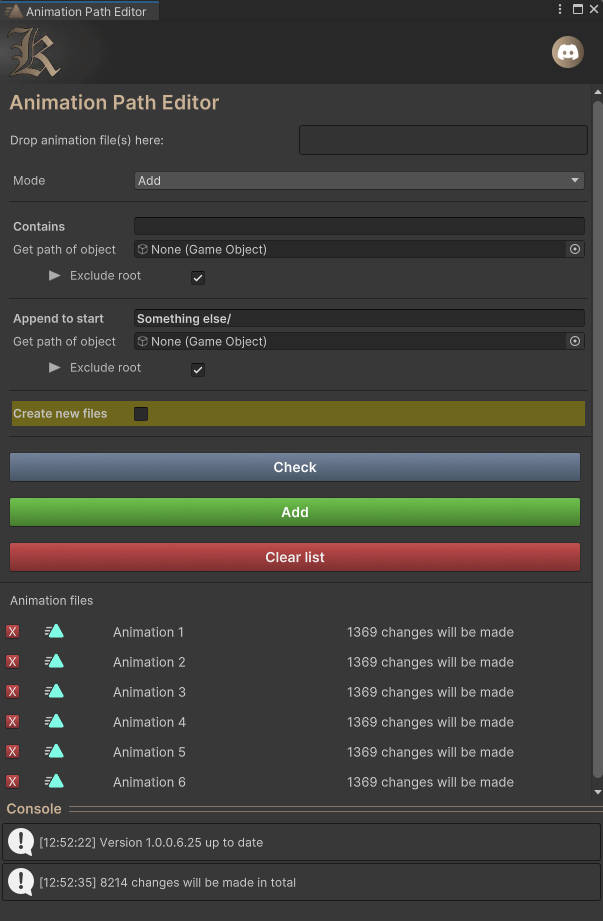
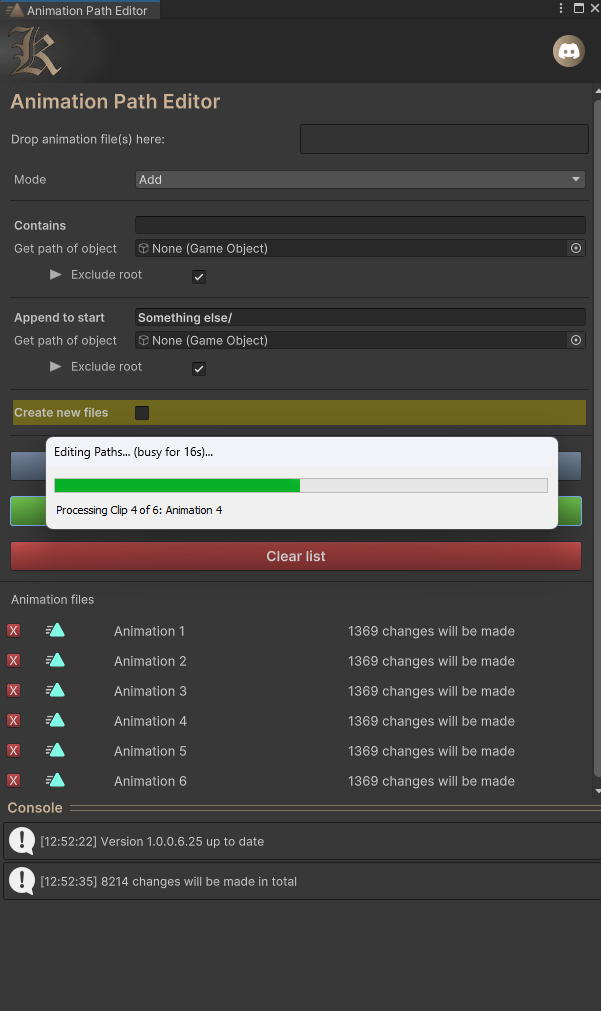
That´s more like it. You see, using this tool for modifying one single line is pretty overkill. But if you have multiple files with dozens of curves, this is the scenario where this tool can shine. I don´t even want to imagine, how long it would take to change 8214 curves by hand. But the one-liner is better for explanation though.
Thank you for using my addon.