Installation
Adding the asset to your project
Before you start, make sure you have Poiyomi shader and VRCFury (add via Creator Companion or ALCOM) in your project.
This asset was created with Poiyomi 9.0. Newer versions should work as well.
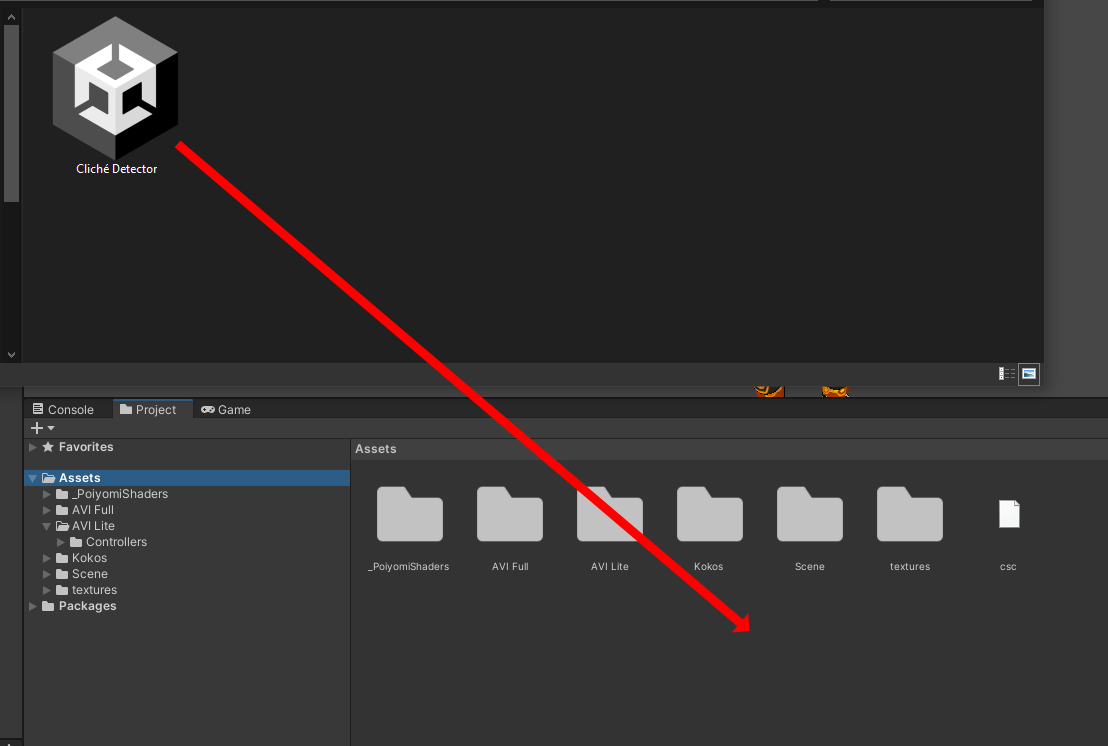
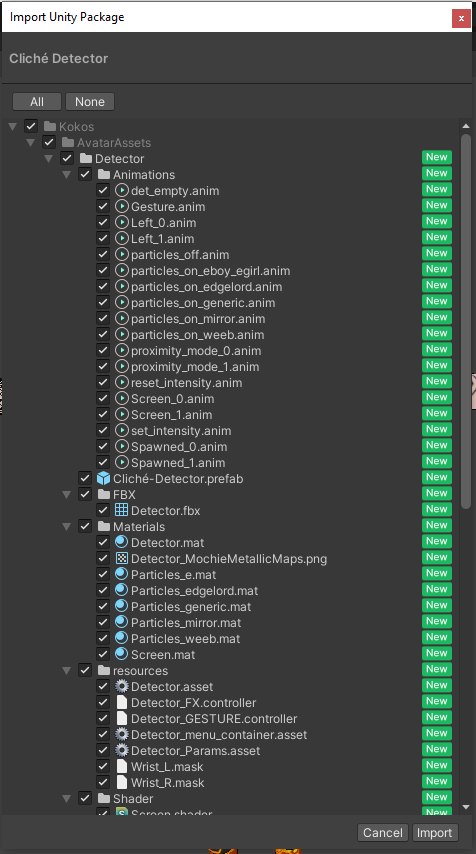
Add the asset to your project by dragging the "Cliché Detector vx.x.x.x" from your downloads into the project file explorer window and click on "import".
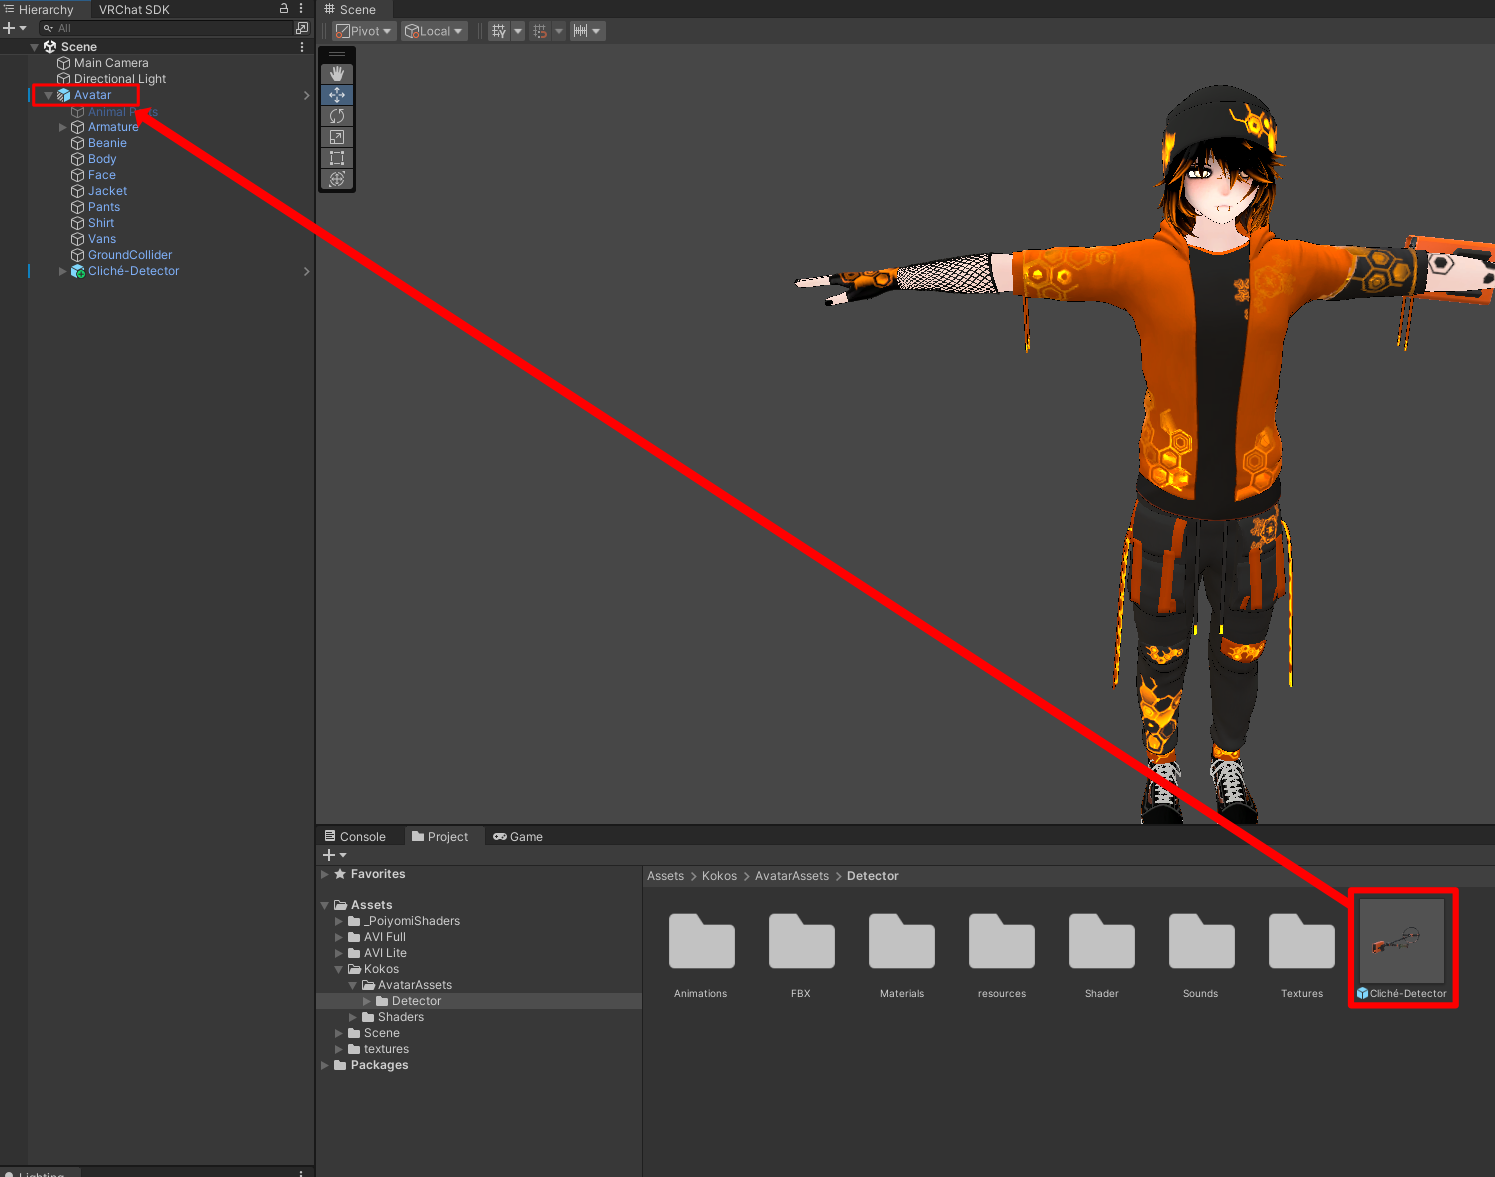
After adding the package, the asset will be located under
Assets -> Kokos -> AvatarAssets -> Detector.
You can now drag and drop the Detector directly onto your avatar.
Position the detector
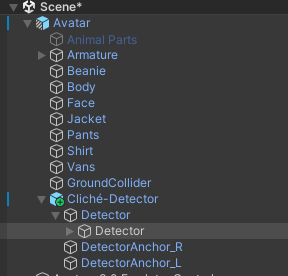
To position the detector, you need to unfold the prefab in the hierarchy.

The DetectorAnchor_R and DetectorAnchor_L are the objects, the detector itself is parented to. Position the DetectorAnchor_R in your avatar’s right hand roughly like this:

The exact position may vary depending on your avatar’s scale and proportions.
To position the Anchor for the left hand, select the Detector first. Then in the inspector you need to change the weight of the Parent Constraint from right to left.

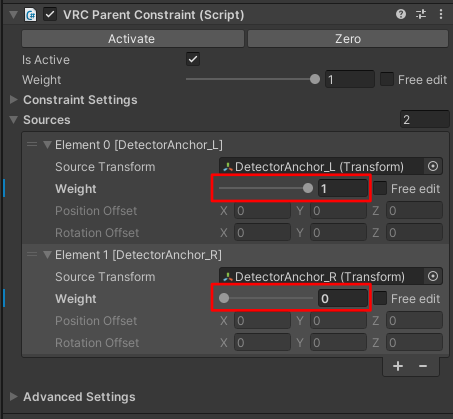
This will make the detector stick to the left anchor. Position the DetectorAnchor_L in your avatar´s left hand.
Scale the detector
If you need to adjust the scale make sure you scale the Detector object which has the ParentConstraint on it and only scale this one.
Move menu
If you want the asset’s menu to be added to one specific menu of your avatar (like an Extras menu), just select the prefab in the project file browser.
In the inspector, look at the 'Full Controller' component.
There you can type the name of your target menu (e.g. 'Extras') into the menu field.

In this example, I moved the detector menu item into the Extras menu that I already have on my avatar.
Edit detection modes
If you want to define your own detection modes, you can do so by adding additional ones (requires some Unity skills), or by altering the existing ones.
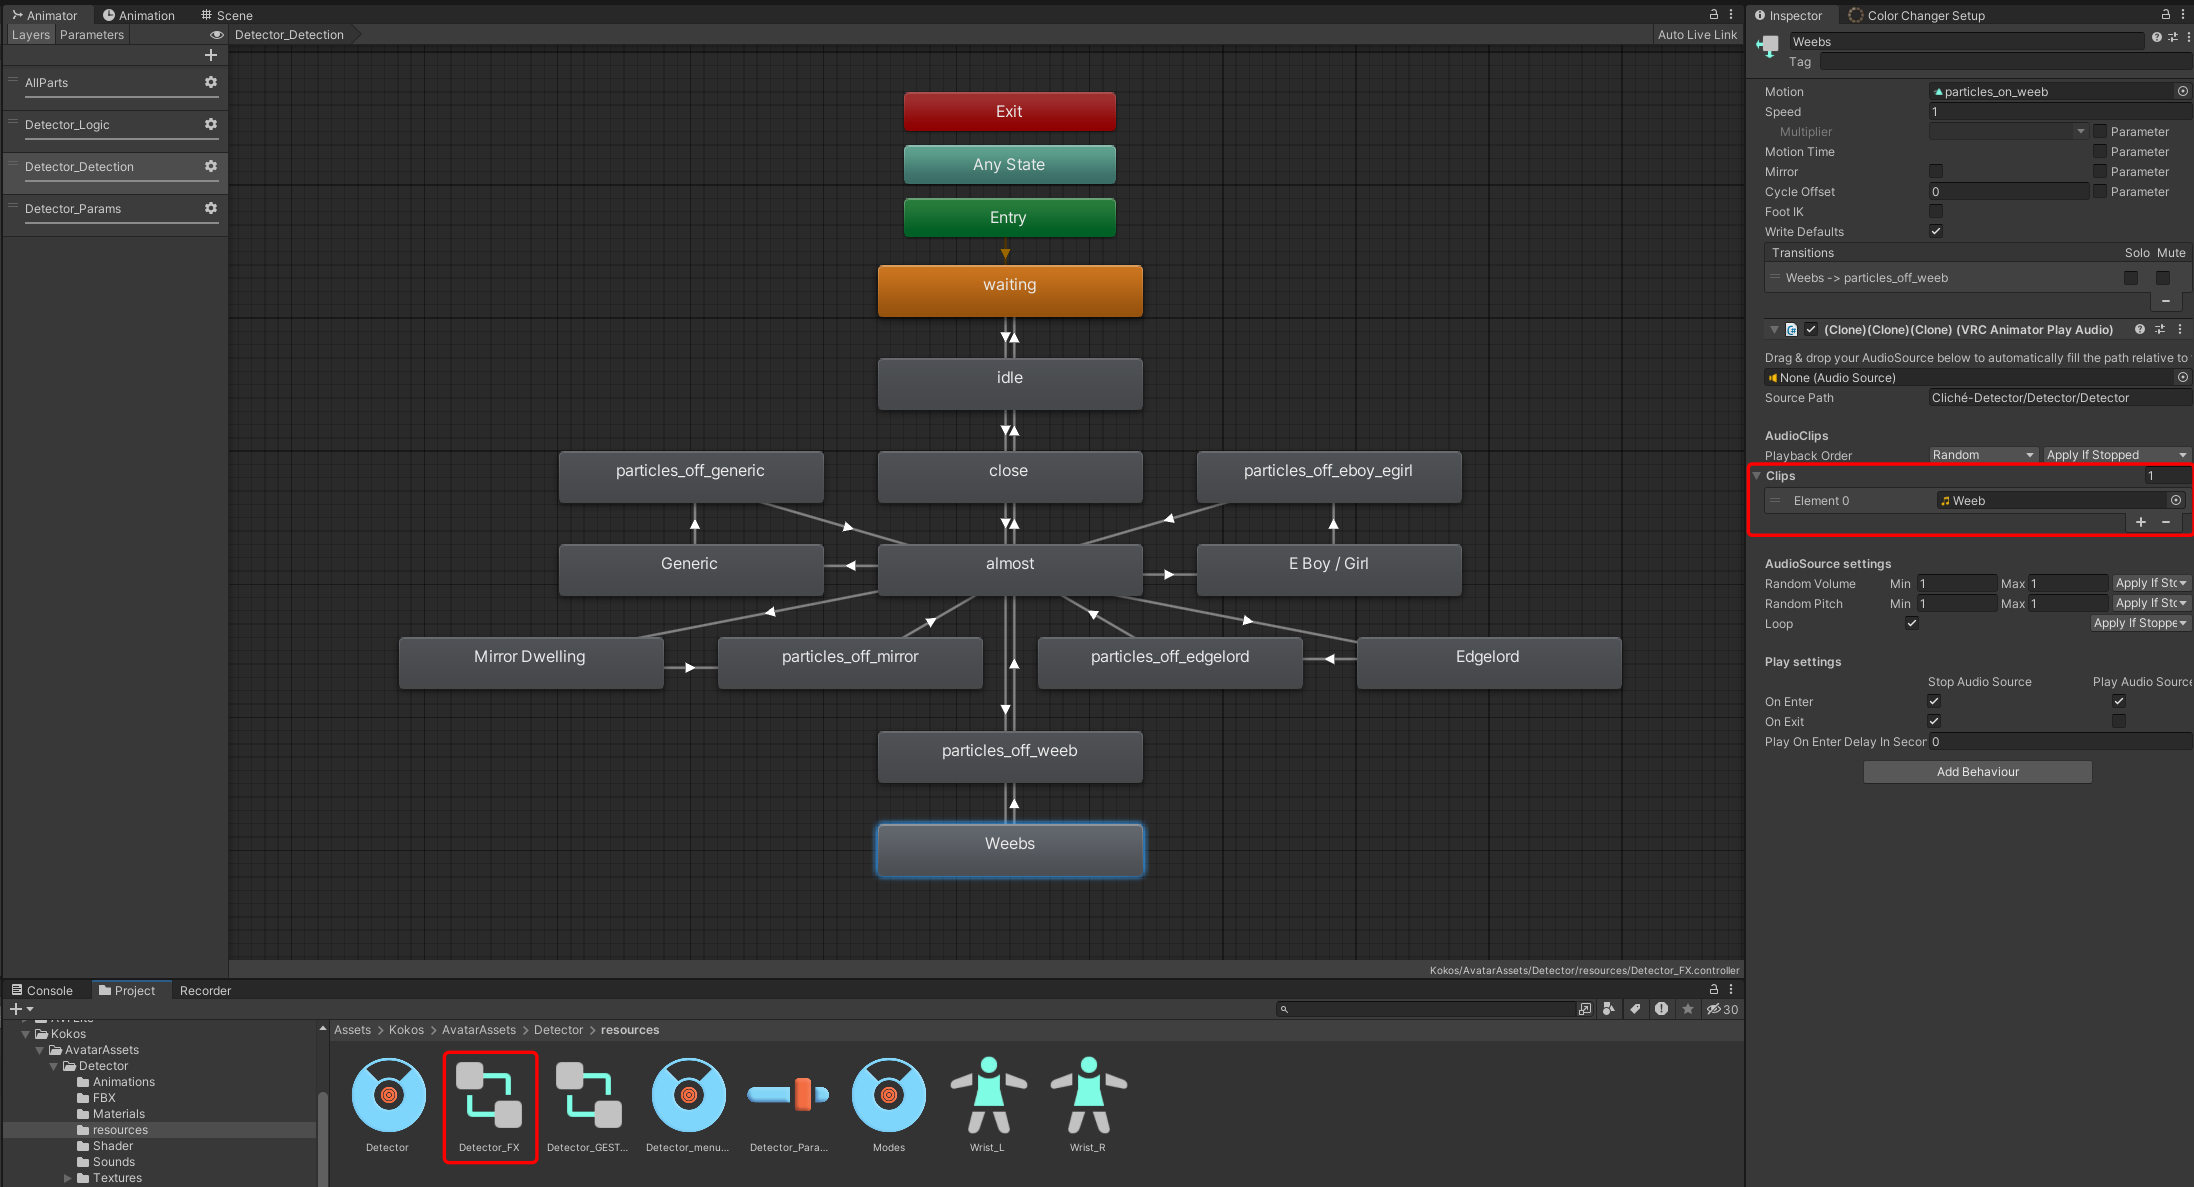
Audio
To alter the sound clip of an existing mode, navigate to the detector´s FX controller in the asset´s resources folder
(Assets -> Kokos -> AvatarAssets -> Detector -> resources).
Open the controller and select the Detector_Detection layer.
Here you can change the sound files of the five modes by selecting one of them and replacing the sound clip.
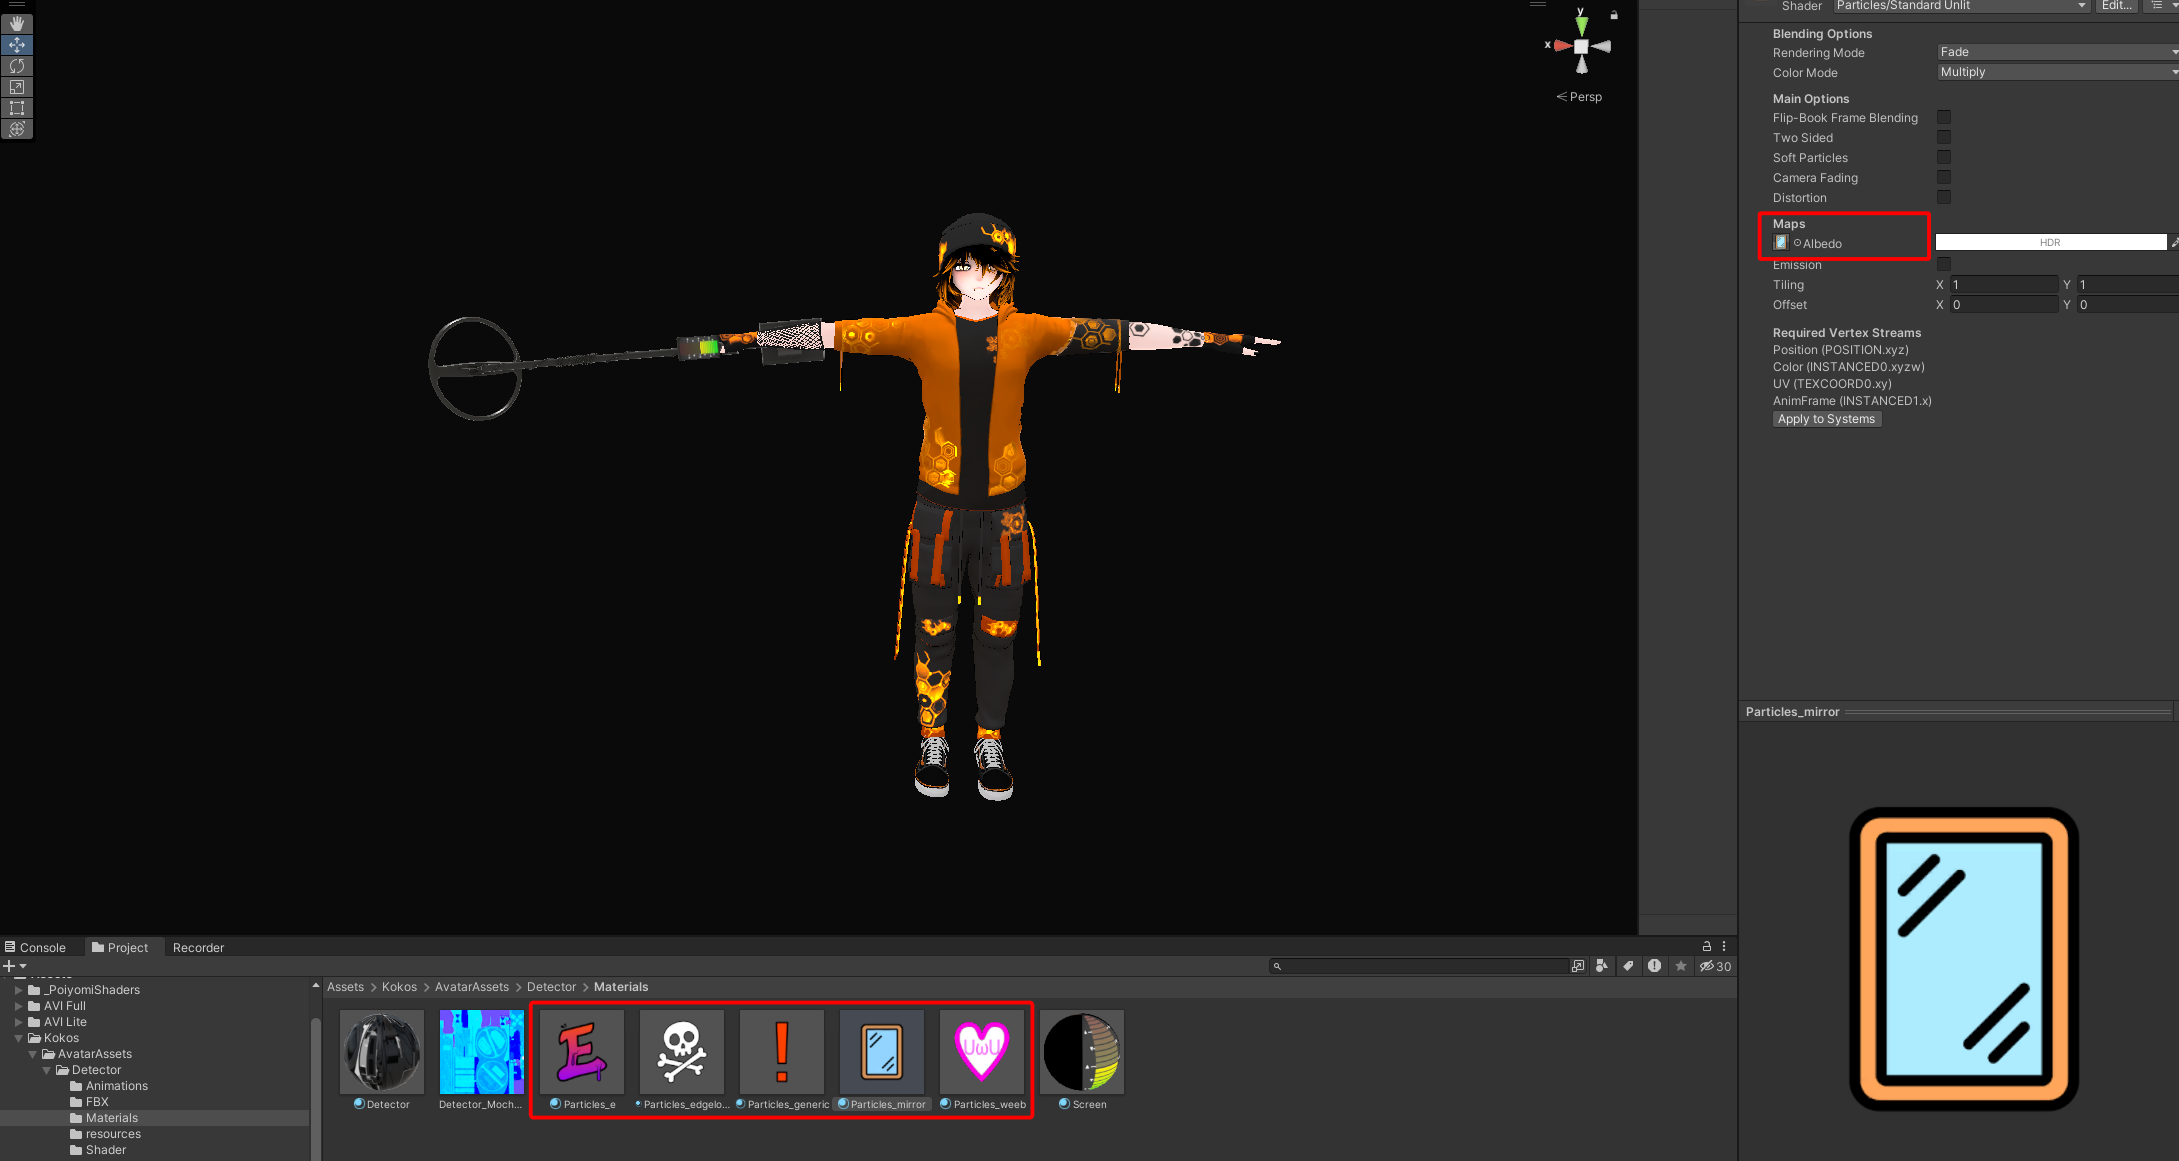
Particles
If you also want to alter the particle texture go to the asset´s materials folder
(Assets -> Kokos -> AvatarAssets -> Detector -> Materials).
Select the material you want to change and replace the texture in the Maps -> Albedo section.
Change Base Color
To change the base color of the detector´s case, select the Cliché Detector/Detector/Detector game object and unfold the Detector material.
Under Color & Normals/Decals/Decal 0 you can find the color entry.
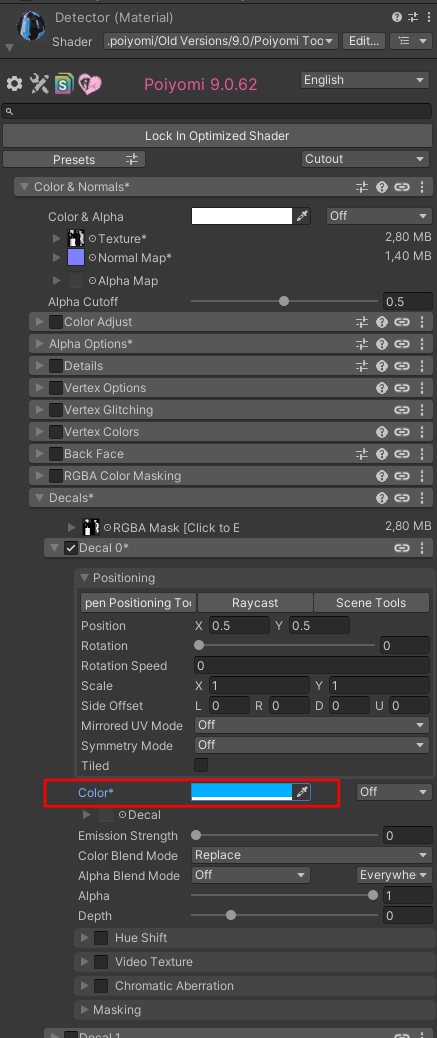
In-game you have the option to use the hue shift to adjust the color of the case. A hue shift can only shif the hue (hence the name), so if you want the case to be a bit darker or less saturated throughout the shift, you need to set a darker and/or less saturated color (preferably red since it is the starting point of the hue shift) for the decal color in this step.
That’s it.