Installation and Usage
Adding the Asset to your project
Before you start, make sure you have VRCFury (via creator companion, ALCOM or as package) added to your project.
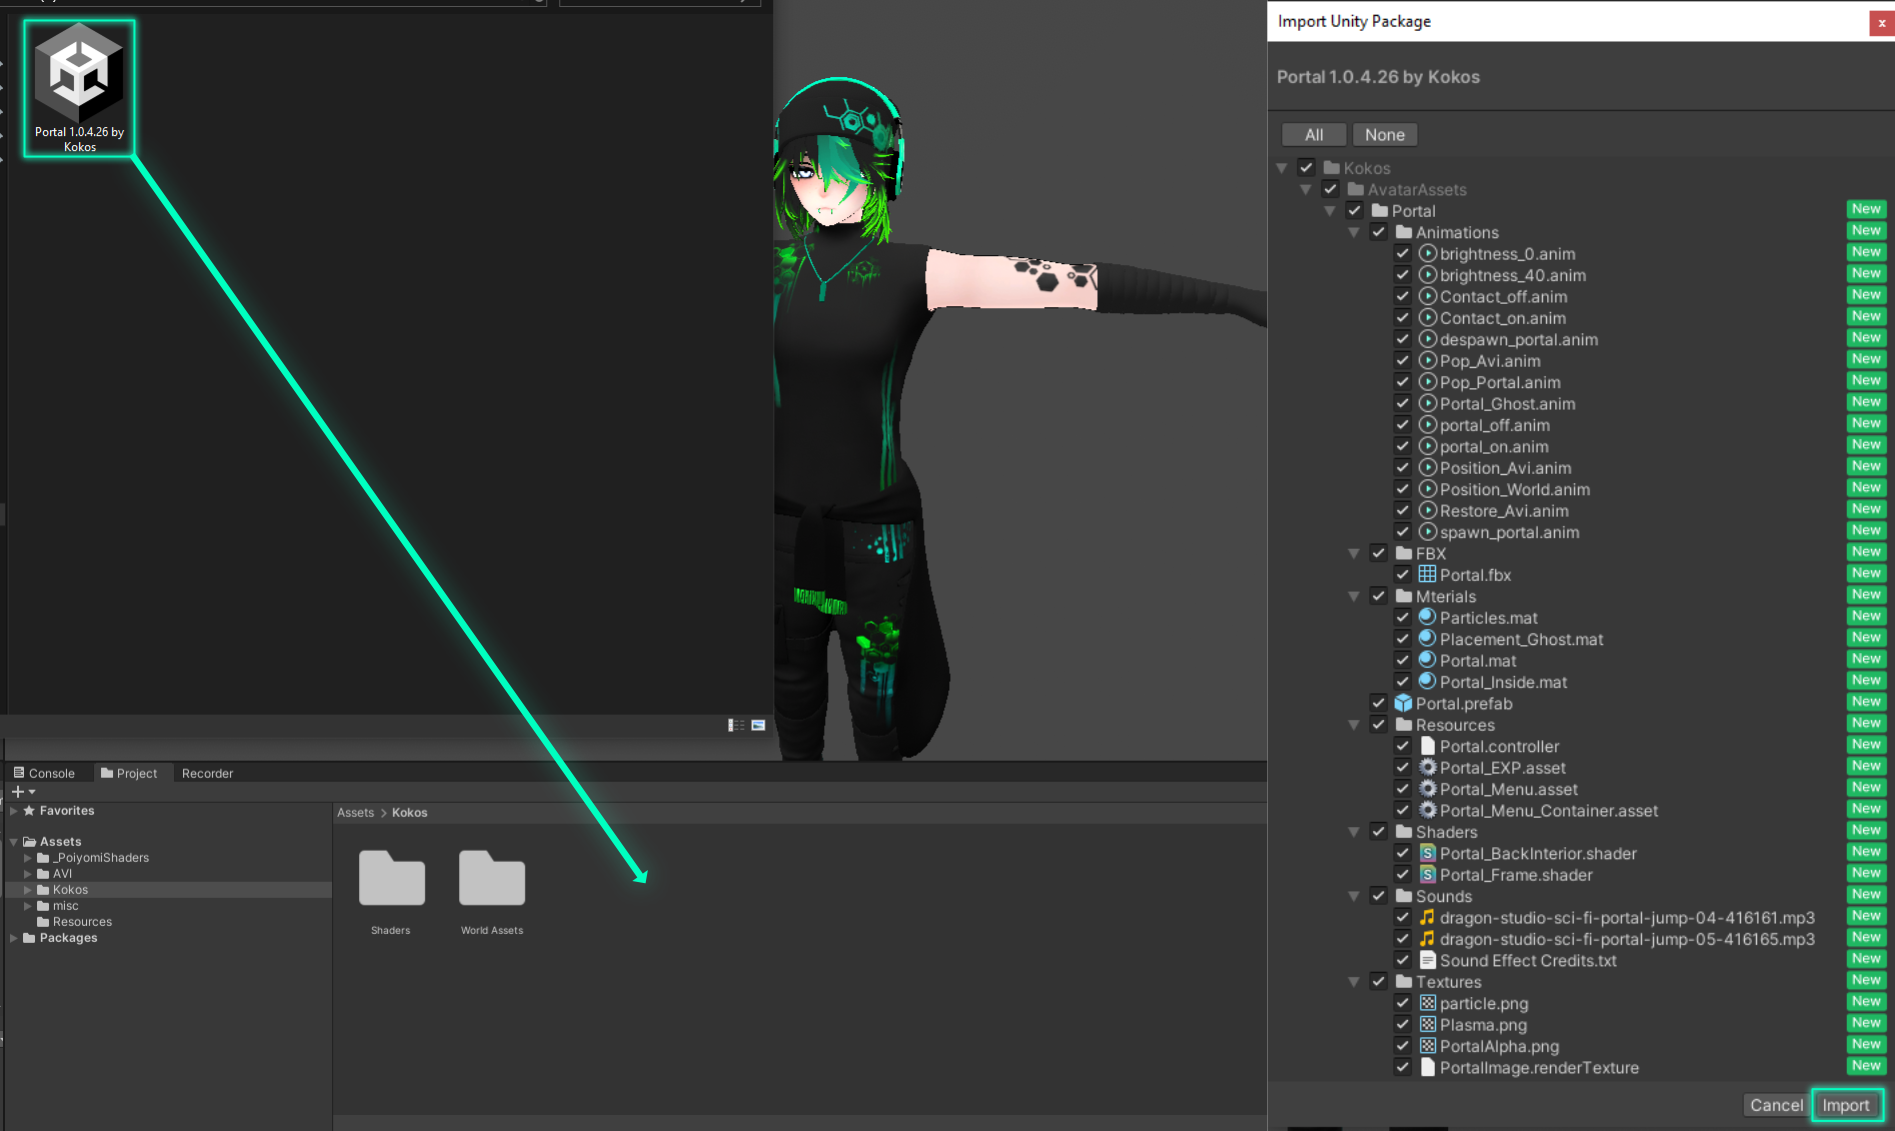
Add the package to your project by dragging the "Portal vx.x.xx.xx" from your downloads into the Project window and click on Import.
Add to Avatar
After adding the package, the prefab will be located under
Assets->Kokos->AvatarAssets->Portal.
You can now drag and drop the prefab directly onto your avatar.
![]()
Position/Scale the Portal
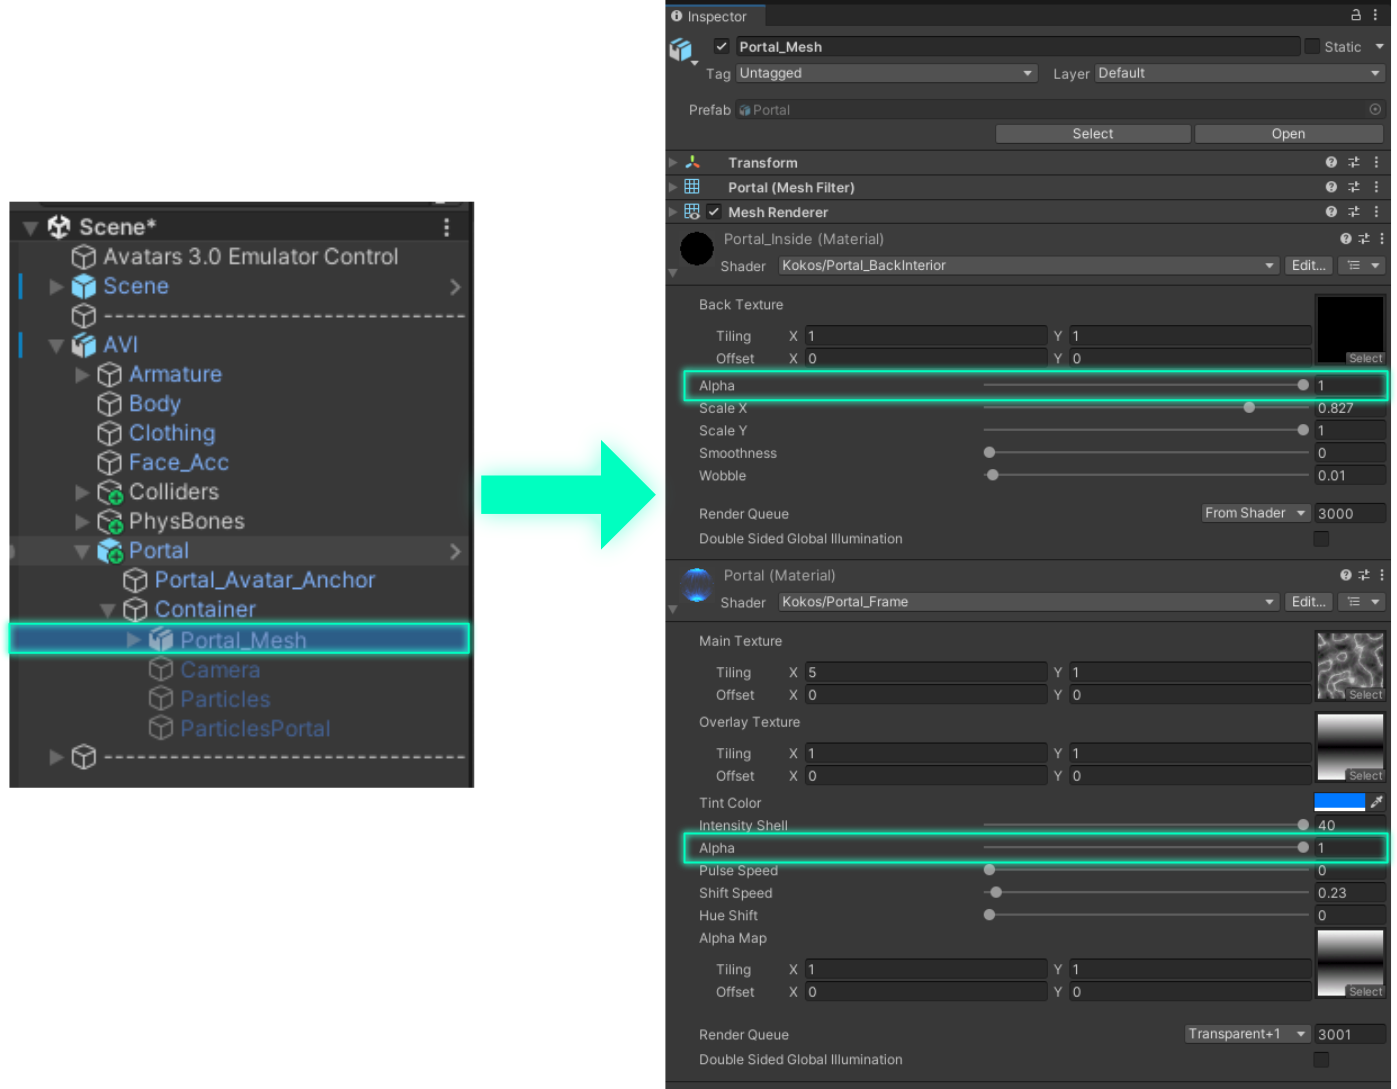
Inside the prefab hierarchy in the container object, select the Portal_Mesh. In the inspector set the Alpha parameter in the Portal material settings to 1 (You can set the Alpha value to 1 in the Portal_Inside settings as well, but that's not necessary).
Do not disable the Portal_Mesh in the hierarchy. Apparently (took a while to figure this out) when all Mesh Renderers of an avatar are disabled, the Animator Controller will be frozen (culled) for remote users.
This would mean, once disappeared, you cannot reappear anymore (locally you do but it won't be synced). To bypass this issue the portal is not deactivated when turned off. It is only hidden by making it transparent.
In some worlds this can cause things to look a bit strange. Most worlds are fine with this method though.
(Some of the screenshots in this guide show the Portal_Mesh disabled - those were taken before this issue was discovered)
Select the Portal_Avatar_Anchor object and position it relative to your avatar as you prefer. To scale the prefab, make sure you select the Container object before scaling.
Scaling the portal will scale the effects with it. This causes them to look bulky when the portal is too large.

Assign particle source
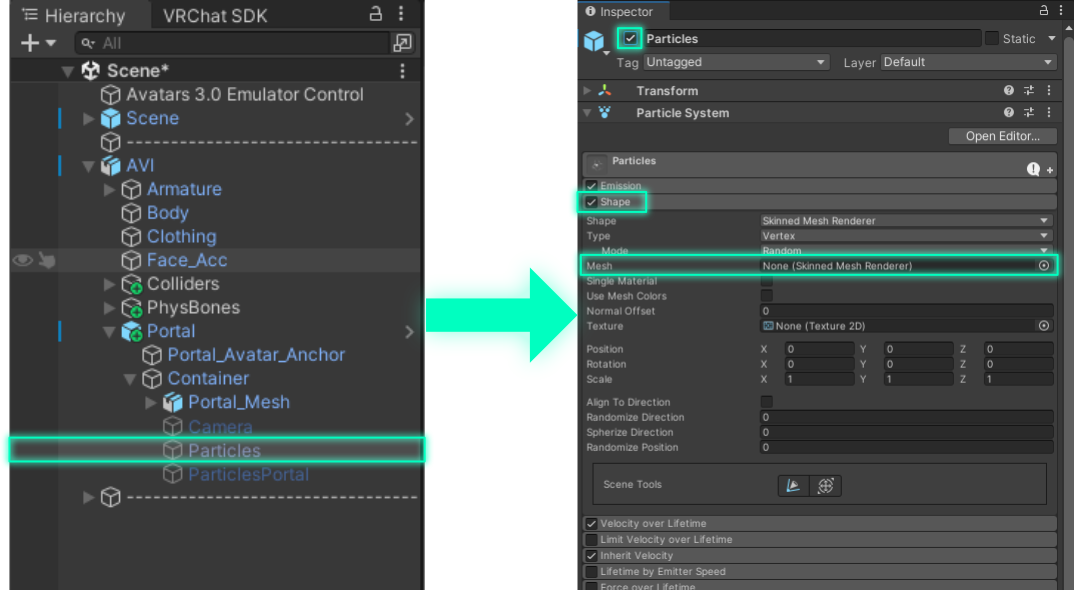
The portal effect lets particles spawn along your avatar's surface. To enable this effect, you need to tell the particle system which mesh to use. To do this, enable the Particles object in the hierarchy and open the Shape module of the particle system in the inspector. Here you need to drag and drop one of your avatar's skinned meshes. Pick the one, that covers the largest area.
For example, in my case I use the Body mesh since it covers all of my avatar (visible by the outline when you select the object in the hierarchy). Depending on how your avatar is structured, it might be a different mesh.

If you have found yours, select the Particles again to bring up the particle system settings in the inspector and then drag and drop your mesh onto the Mesh field shown earlier.
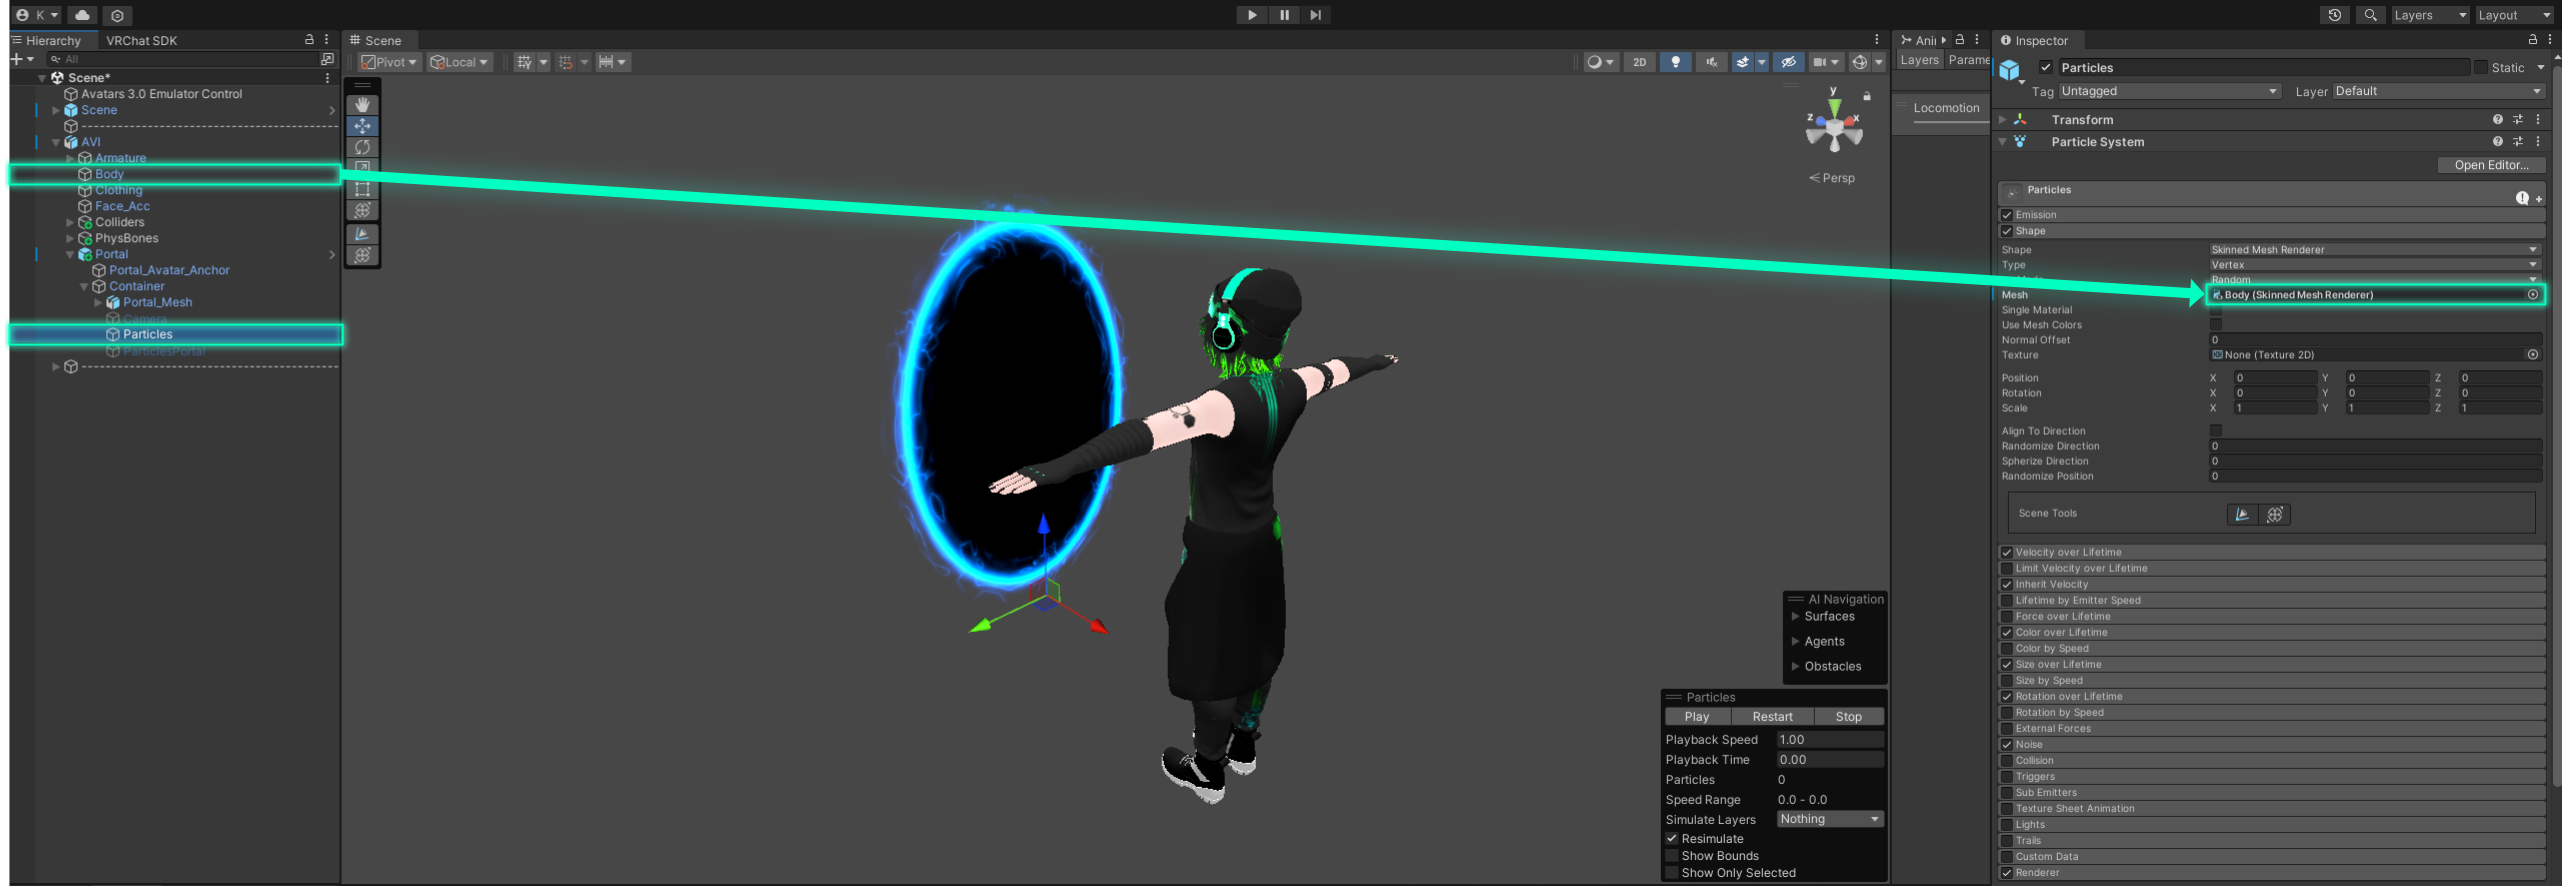
You can test the effect by clicking on the play button located in the particle menu in the bottom right corner of the 3D view while having the Particles selected in the hierarchy.
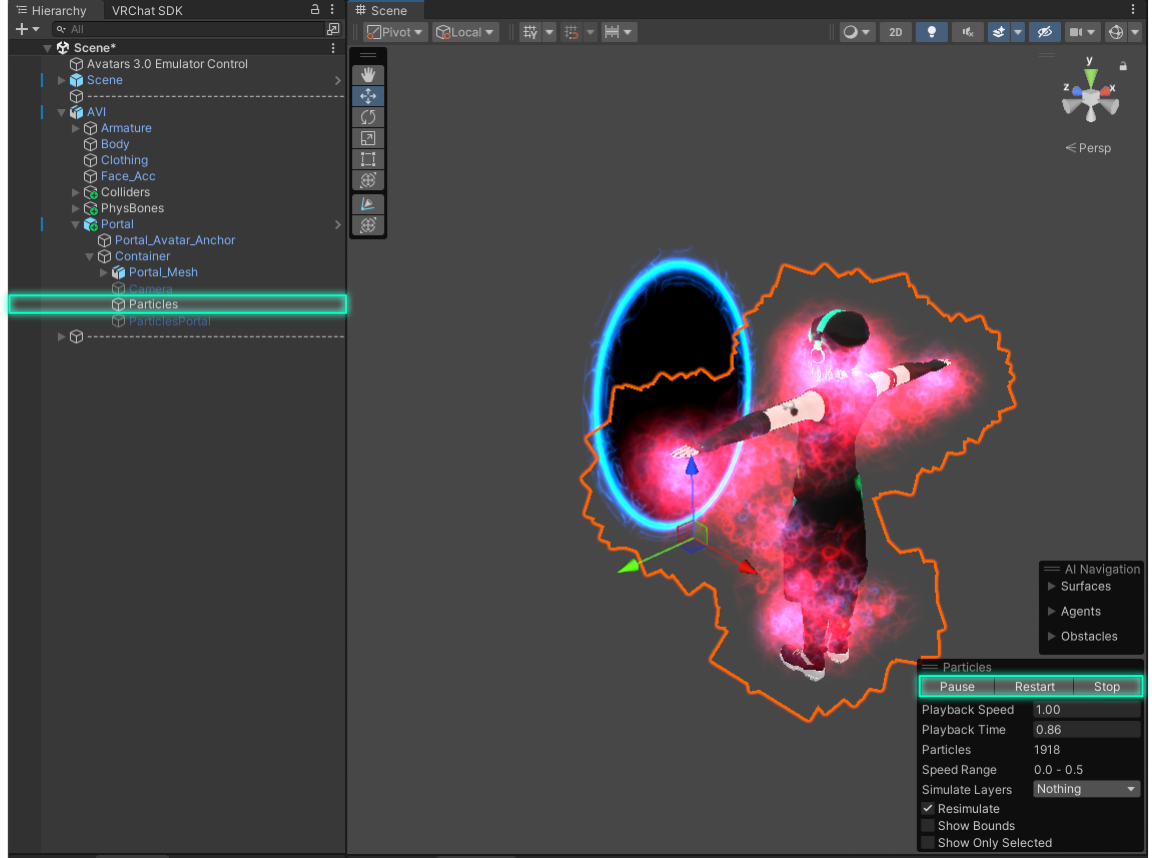
When you are done with this setup, you can disable the Particles by unchecking the box at the top of the inspector as well as the Portal_Mesh by using the Alpha values in the material settings.
Adjust animations
If you already know how to do this then I got the short version for you:
Avi_Pop animation - hide all visible parts at 0:00.
Restore_Avi animation - reset all visible parts at 0:00.
Basically a simple toggle animation set.
Detailed version:
In order to hide your avatar properly when the effect plays, you need to modify two of the animations.
Navigate to the Animations folder inside the prefab directory in the file browser. Select the Avi_Pop and the Restore_Avi animations and drop them onto your avatar.
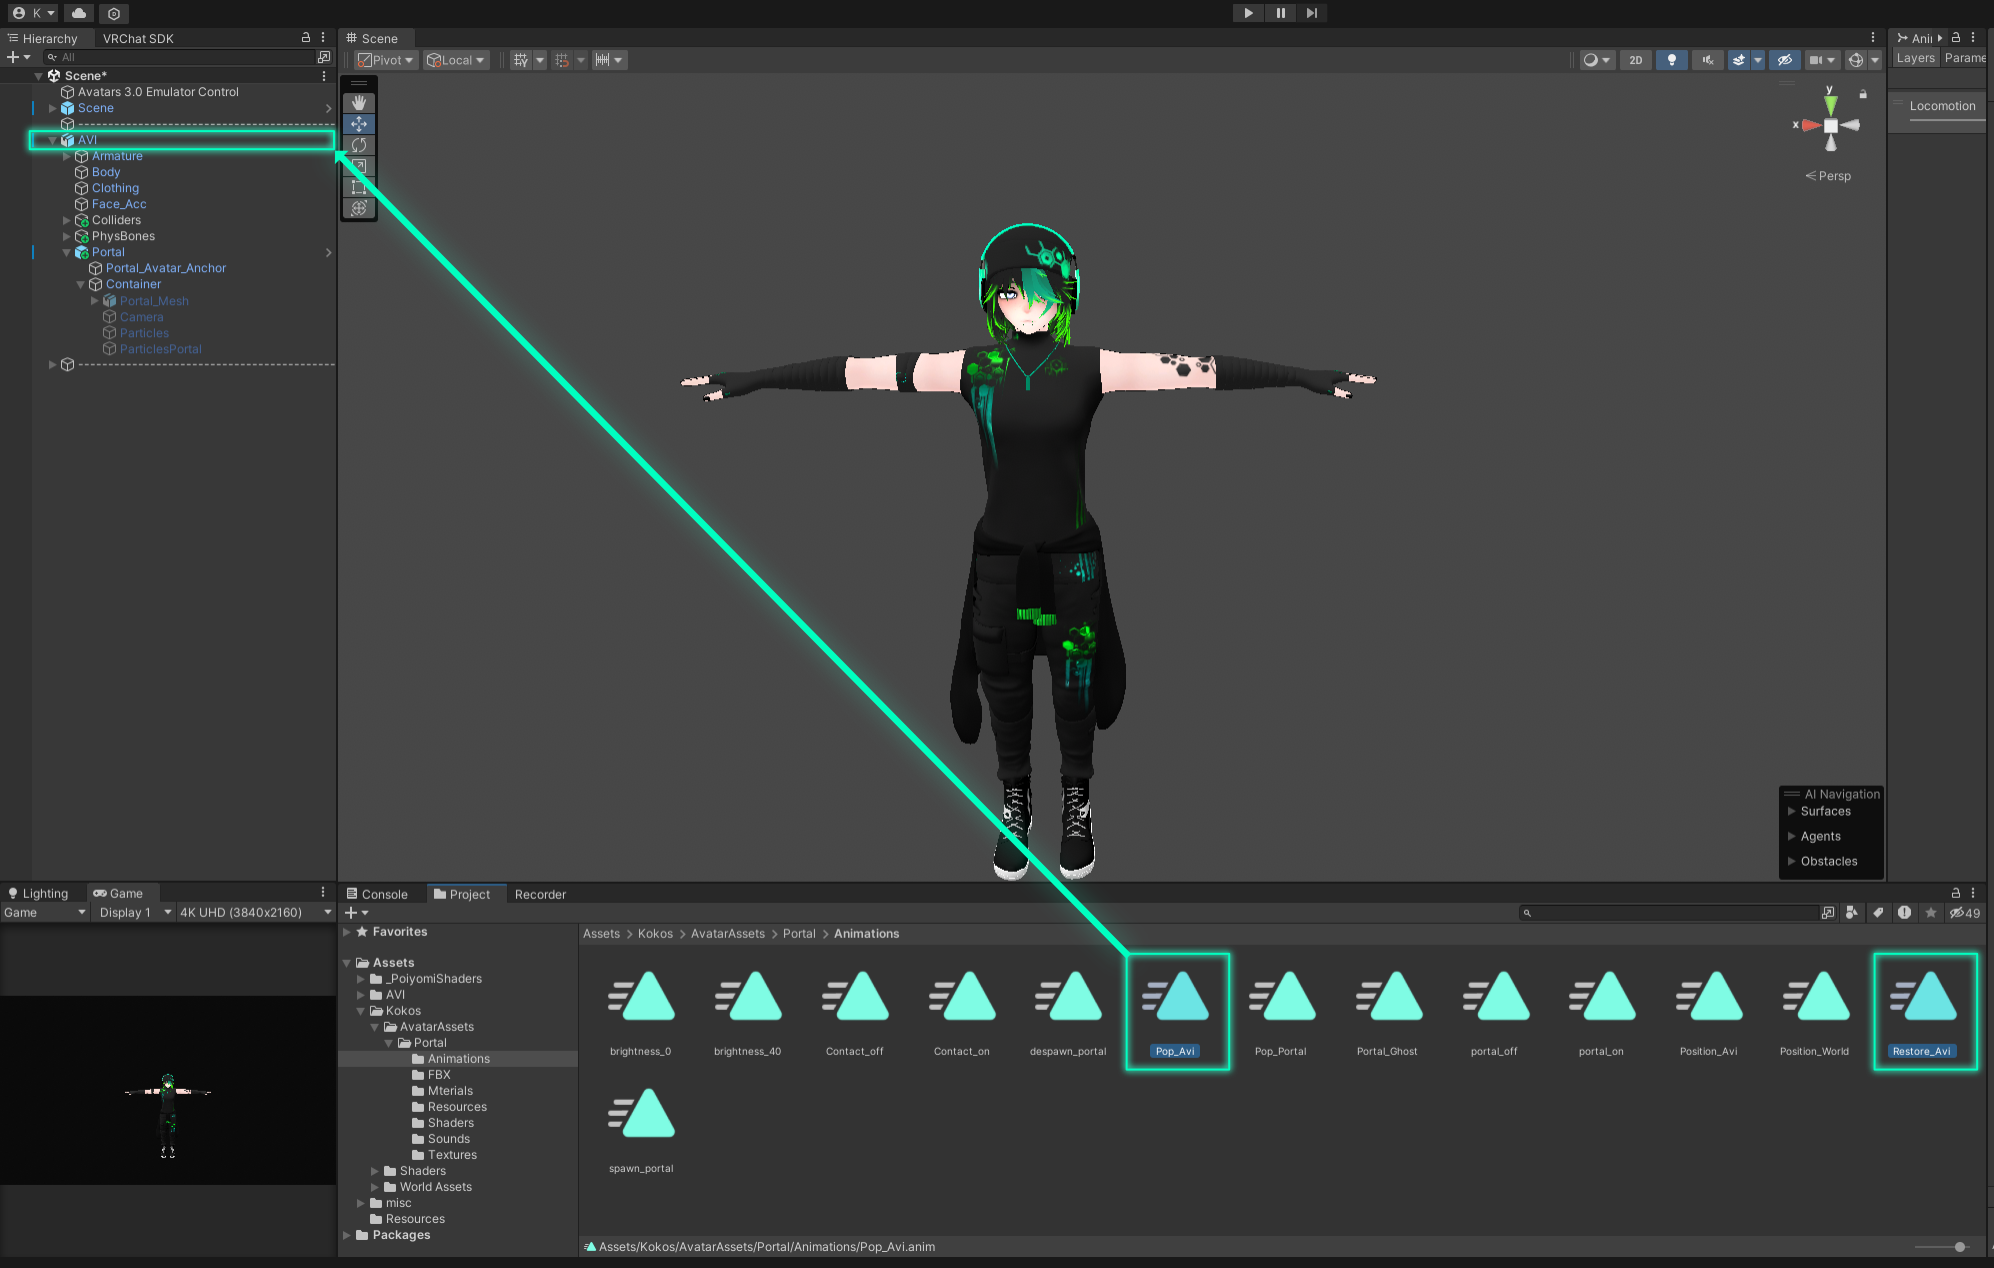
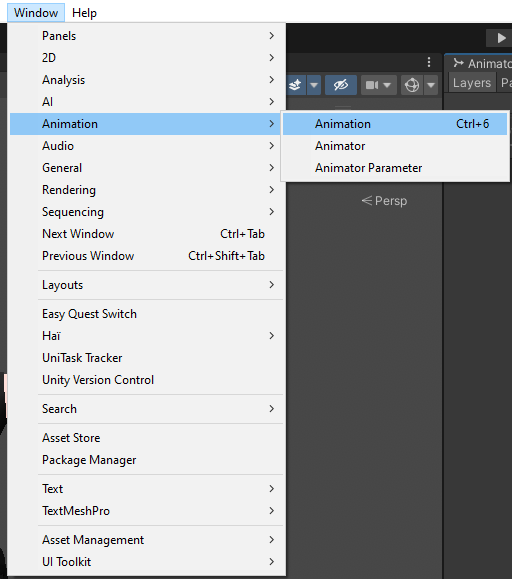
This creates an animator controller (or uses an existing one if available) that lets you preview and edit the animations. Next bring up the Animation window (Window -> Animation -> Animation or CTRL + 6).
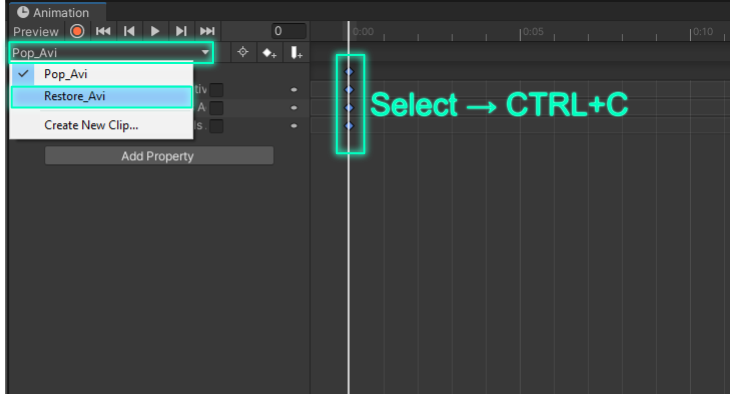
Select your avatar (root object) in the hierarchy, then make sure the Pop_Avi animation is selected in the dropdown of the Animation window.
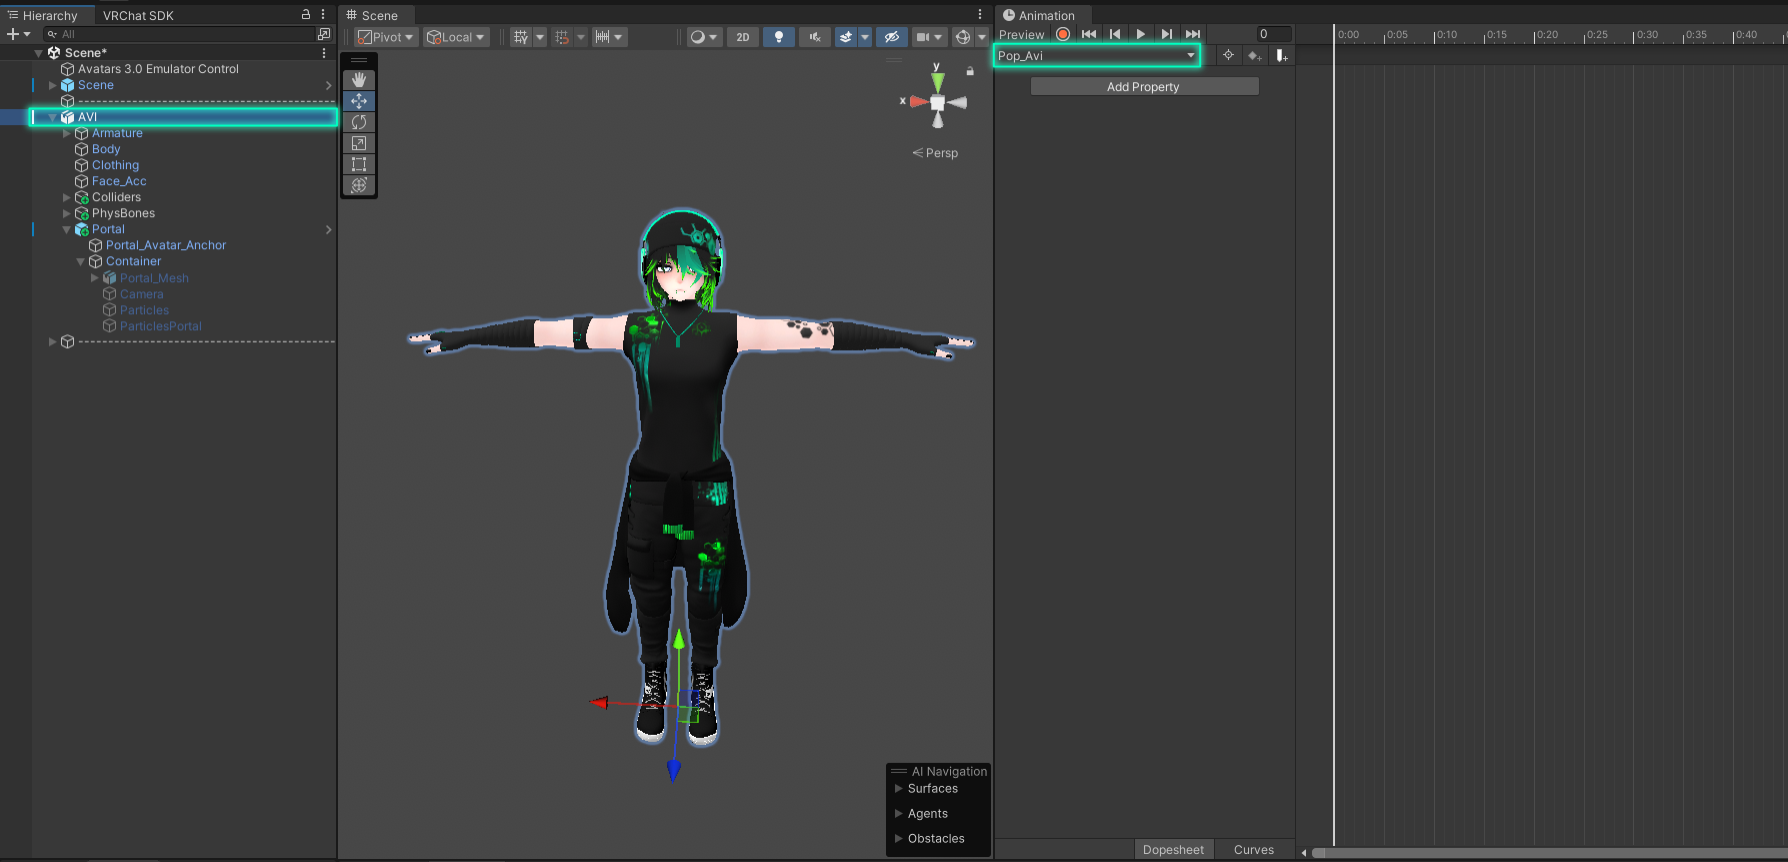
You now need to disable the visible objects of your avatar and record this as keyframes in the animation.
Depending on the setup of your avatar you can do this in different ways. The easiest method is to disable the game object completely. To do this, click the little record button at the top of the animation window, then select each visible object of your avatar and uncheck it in the inspector.
![]()
This adds the keyframes to the timeline. When you are done, click on the record button again, to stop recording and on the preview button, to bring back your avatar.
If other animations already animate this property you should not use it again in a second animation simultaneously. This can cause objects to flicker or lead to the objects not responding at all.
If this property is already occupied by other animations, you can deactivate the mesh renderer as alternative or if that also doesn't work, you can animate shader properties like 'alpha cut-off' or 'tile discarding'
or other properties depending on the shader/ setup you use.
If you have troubles setting this up properly, feel free to reach out.
In most cases either deactivating the object or the renderer component should work.
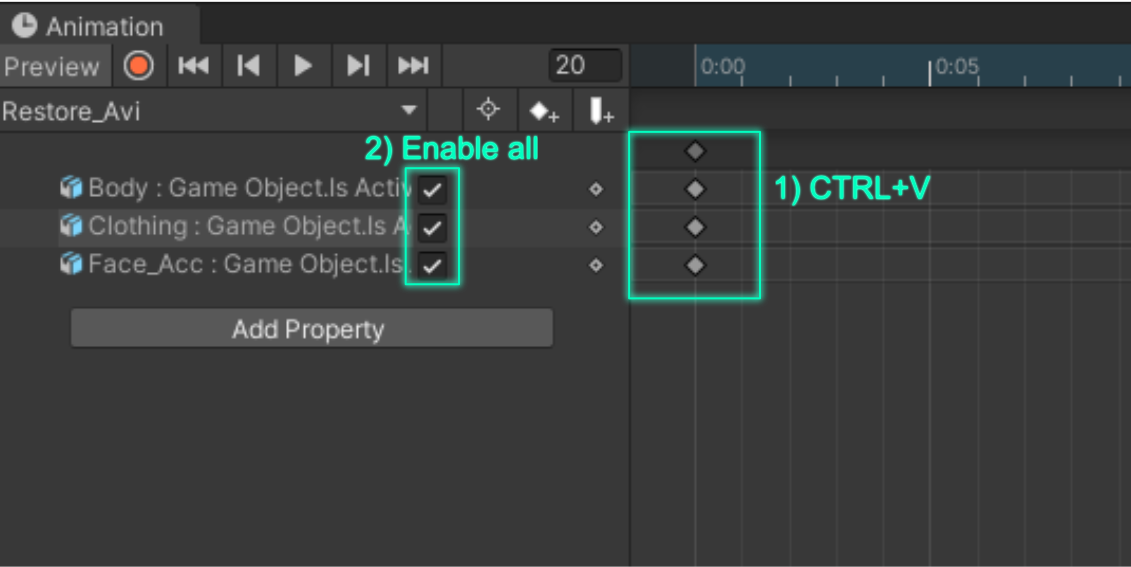
Next, select all keyframes (by clicking the topmost little diamond or dragging a selection rectangle over them) and copy them (CTRL+C since there is no "copy" option in the context menu). Then switch to the Restore_Avi animation.
Here you simply paste the keyframes at 0:00. Then bring back all the objects (in this case by checking all boxes of all meshes in the list on the left).
When you are done, make sure you disable the preview (click the preview button) to get your avatar out of the Biker pose.
That's basically it.
To clean things up, you can remove the animator controller, that was created earlier by either deleting it from the Animations folder or by clicking on your avatar in the hierarchy navigating to the Animator component in the Inspector and removing it from there.
Make sure, your avatar is not in any preview pose when removing the controller. In rare cases this can lead to your avatar getting stuck in that pose. Unity 2022+ seems to not have this problem anymore. It is till recommended to exit preview prior the deletion of animations or controllers though.

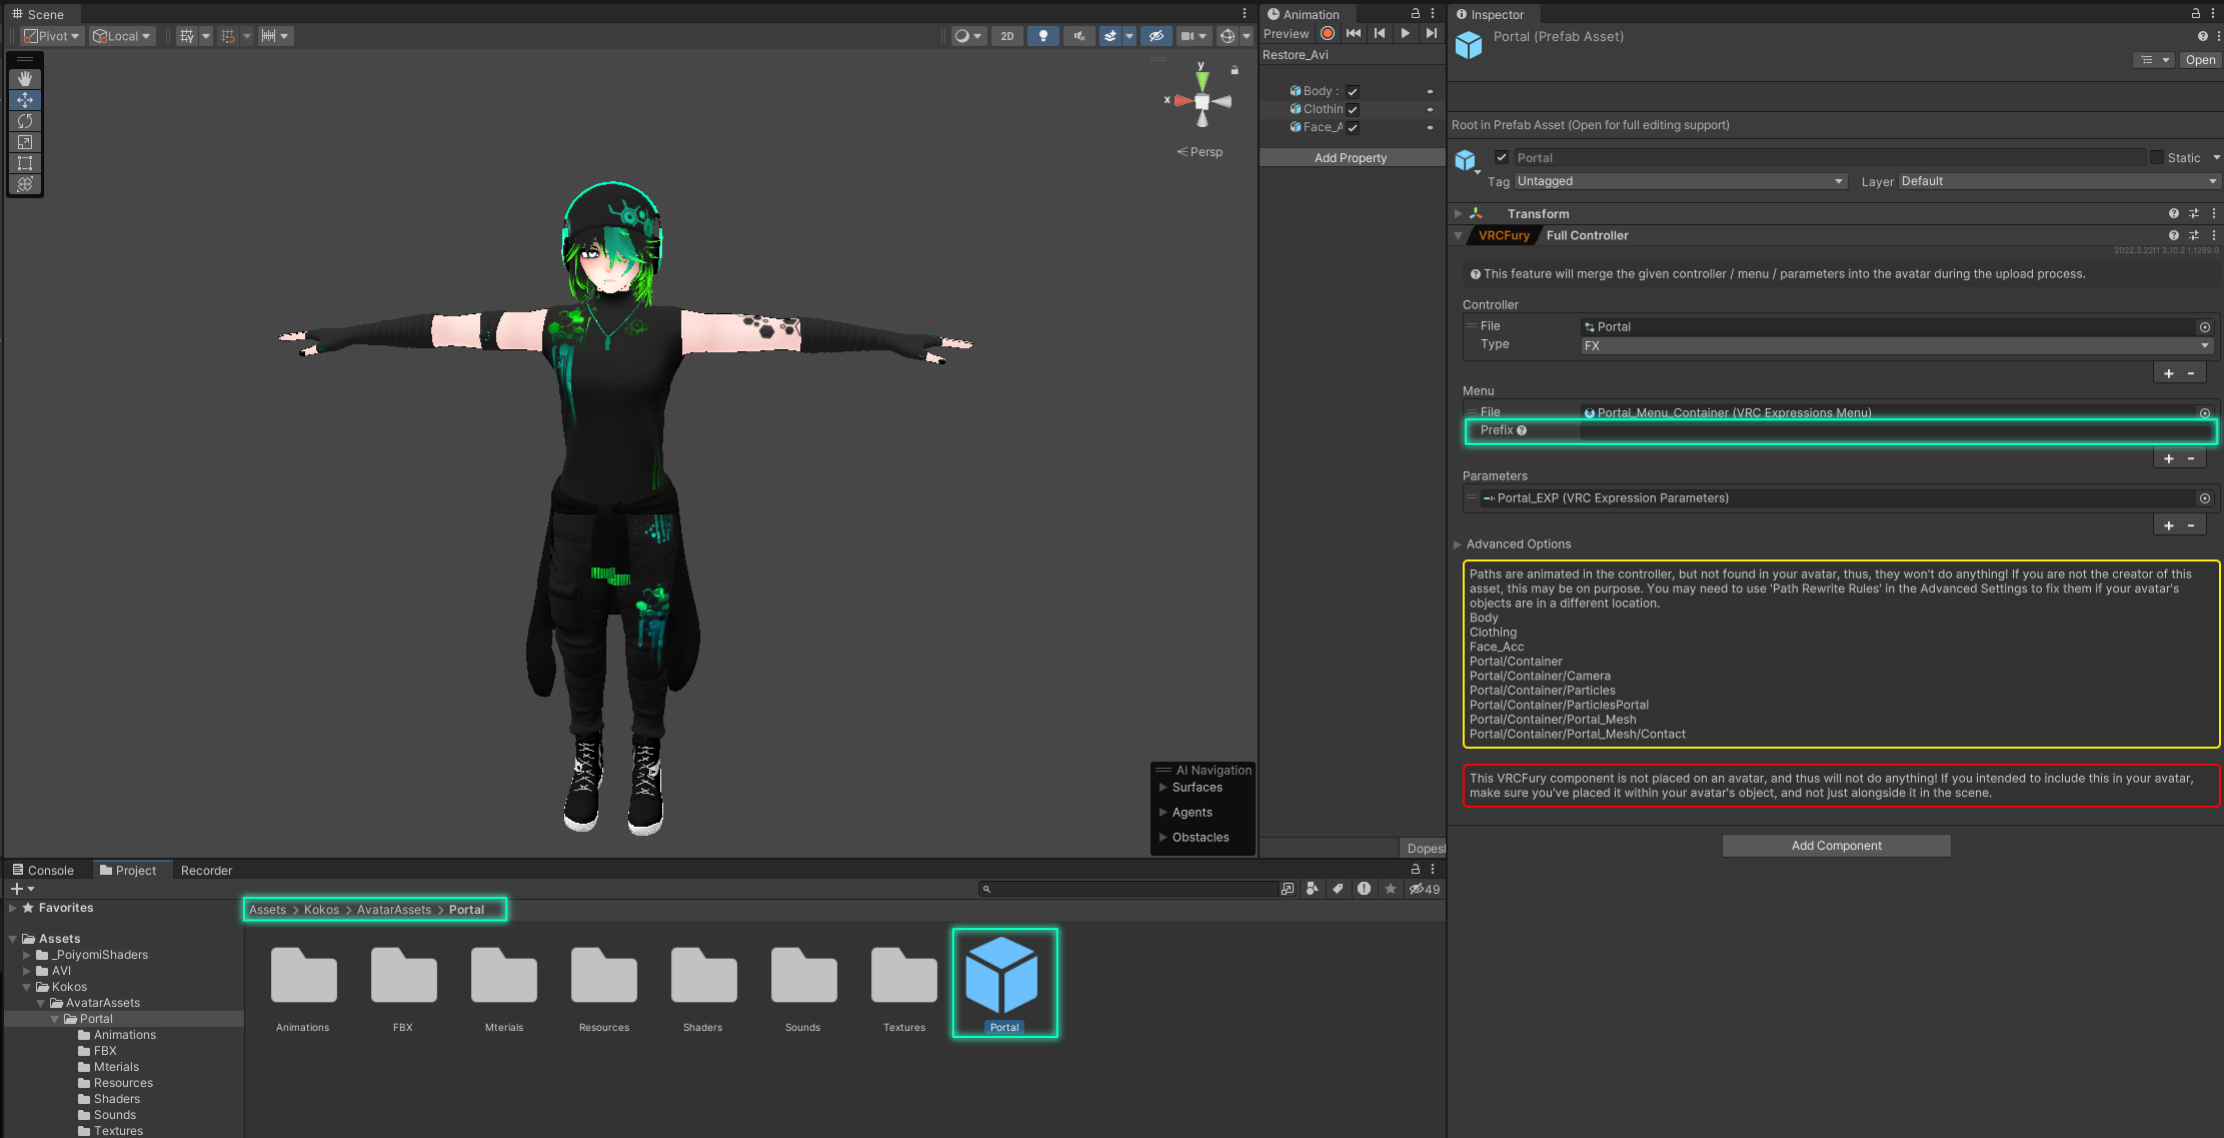
Change Menu Location
If you want the asset’s menu to be added to one specific menu of your avatar (like an Extras menu), just select the prefab in the project file browser. In the inspector, look at the 'Full Controller' component. There you can type the name of your target menu (e.g. 'Extras') into the prefix field in the menu section.
Usage
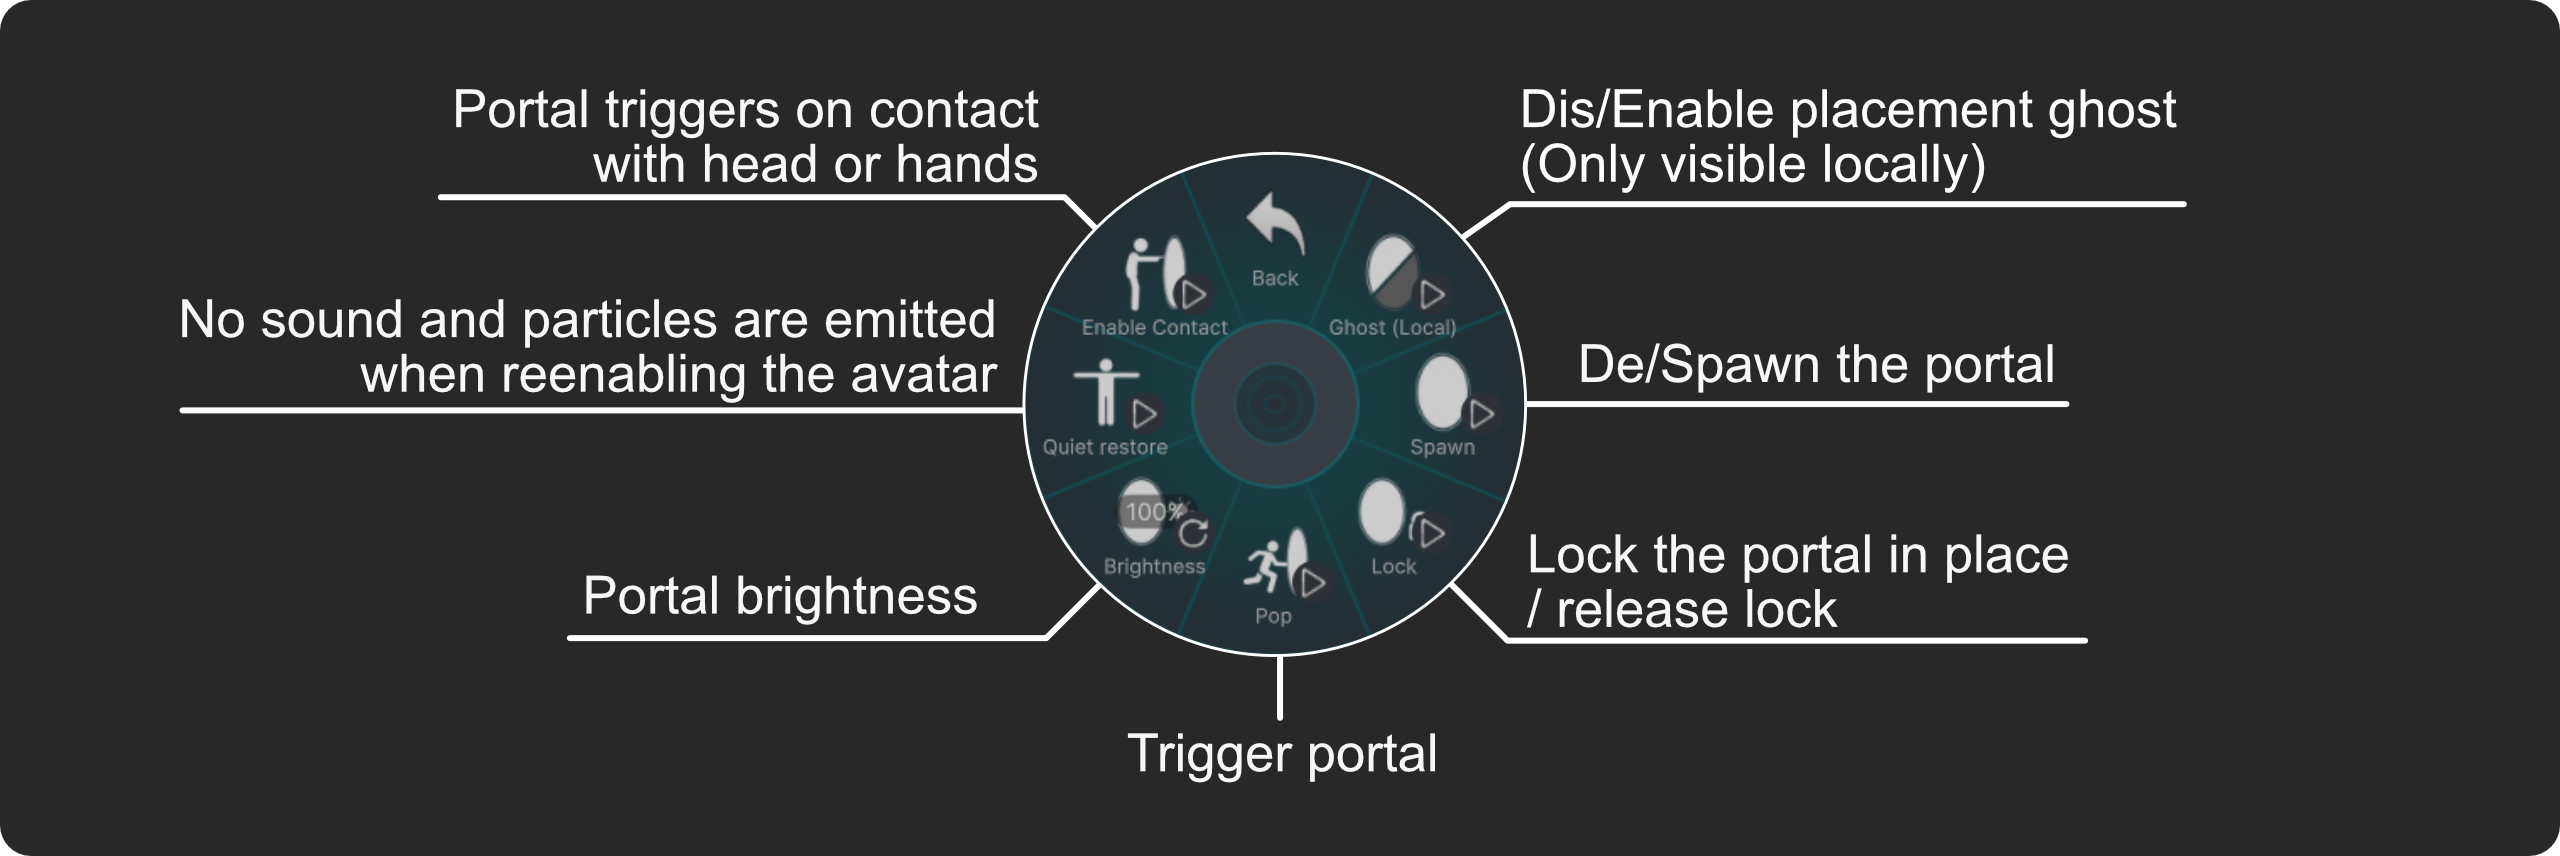
Applies to version 1.0 (1.1 uses a different approach).
When spawning the portal, wait untill the animation has finished (portal has settled down). Otherwise your avatar will just dissapear without the particles.
This is because the spawn has a bypass when you activate the "pop" option before spawning the portal, so you can appear out of the portal without having to walk into it first.
Known issue
In Editor (play mode when testing with an avatar emulator), the camera can render a wrong image when the asset is locked in position and the avatar is moved around.
It appears that the image is generated before the parent constraint is applied, so the camera "sees" the portal in front of it while being attached to the same portal.
This does not happen in-game. It appears to be either something editor related or simply a bug.