
Setup

Image

Adding and Using the Presentation Gear

VRC Fury

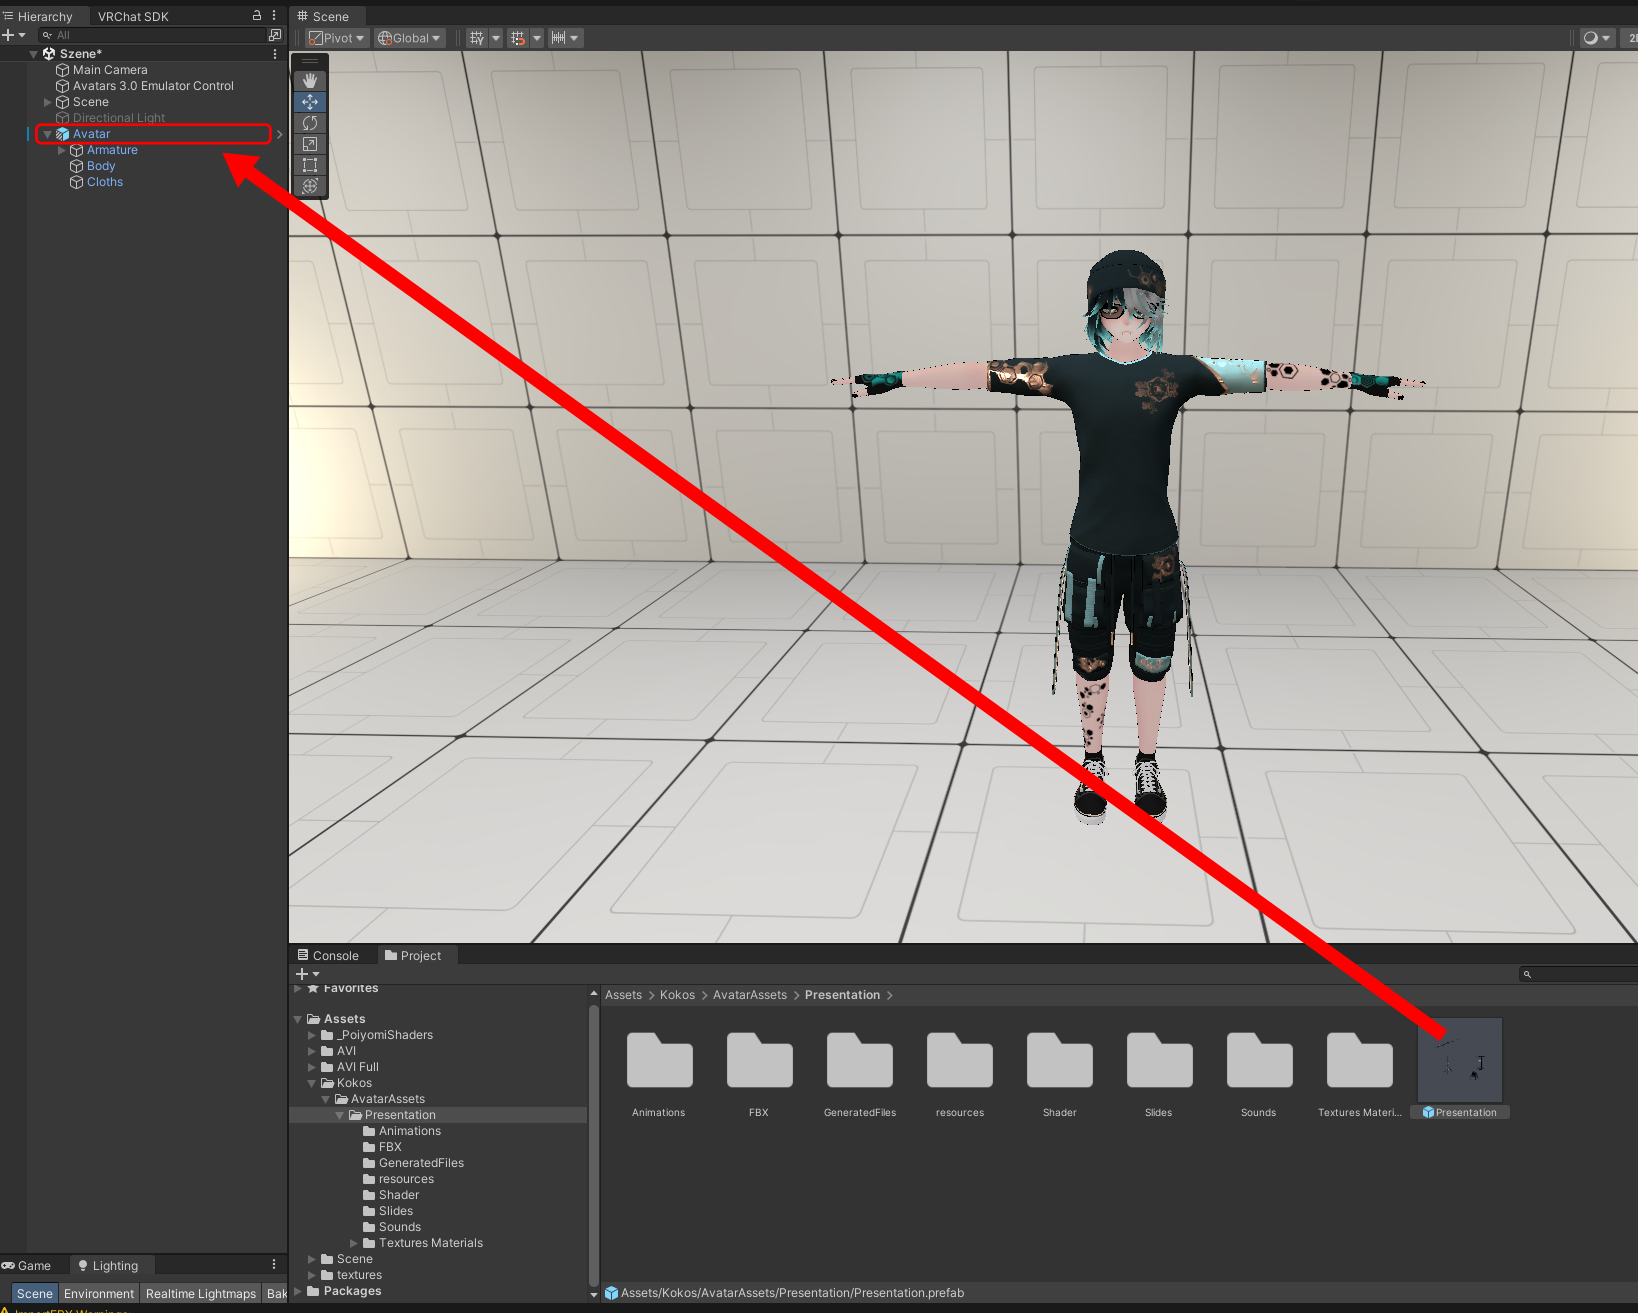
To install this asset via VRC Fury simply drag and drop the "Presentation" prefab inside Assets/Kokos/AvatarAssets/Presentation onto your avatar.

Image

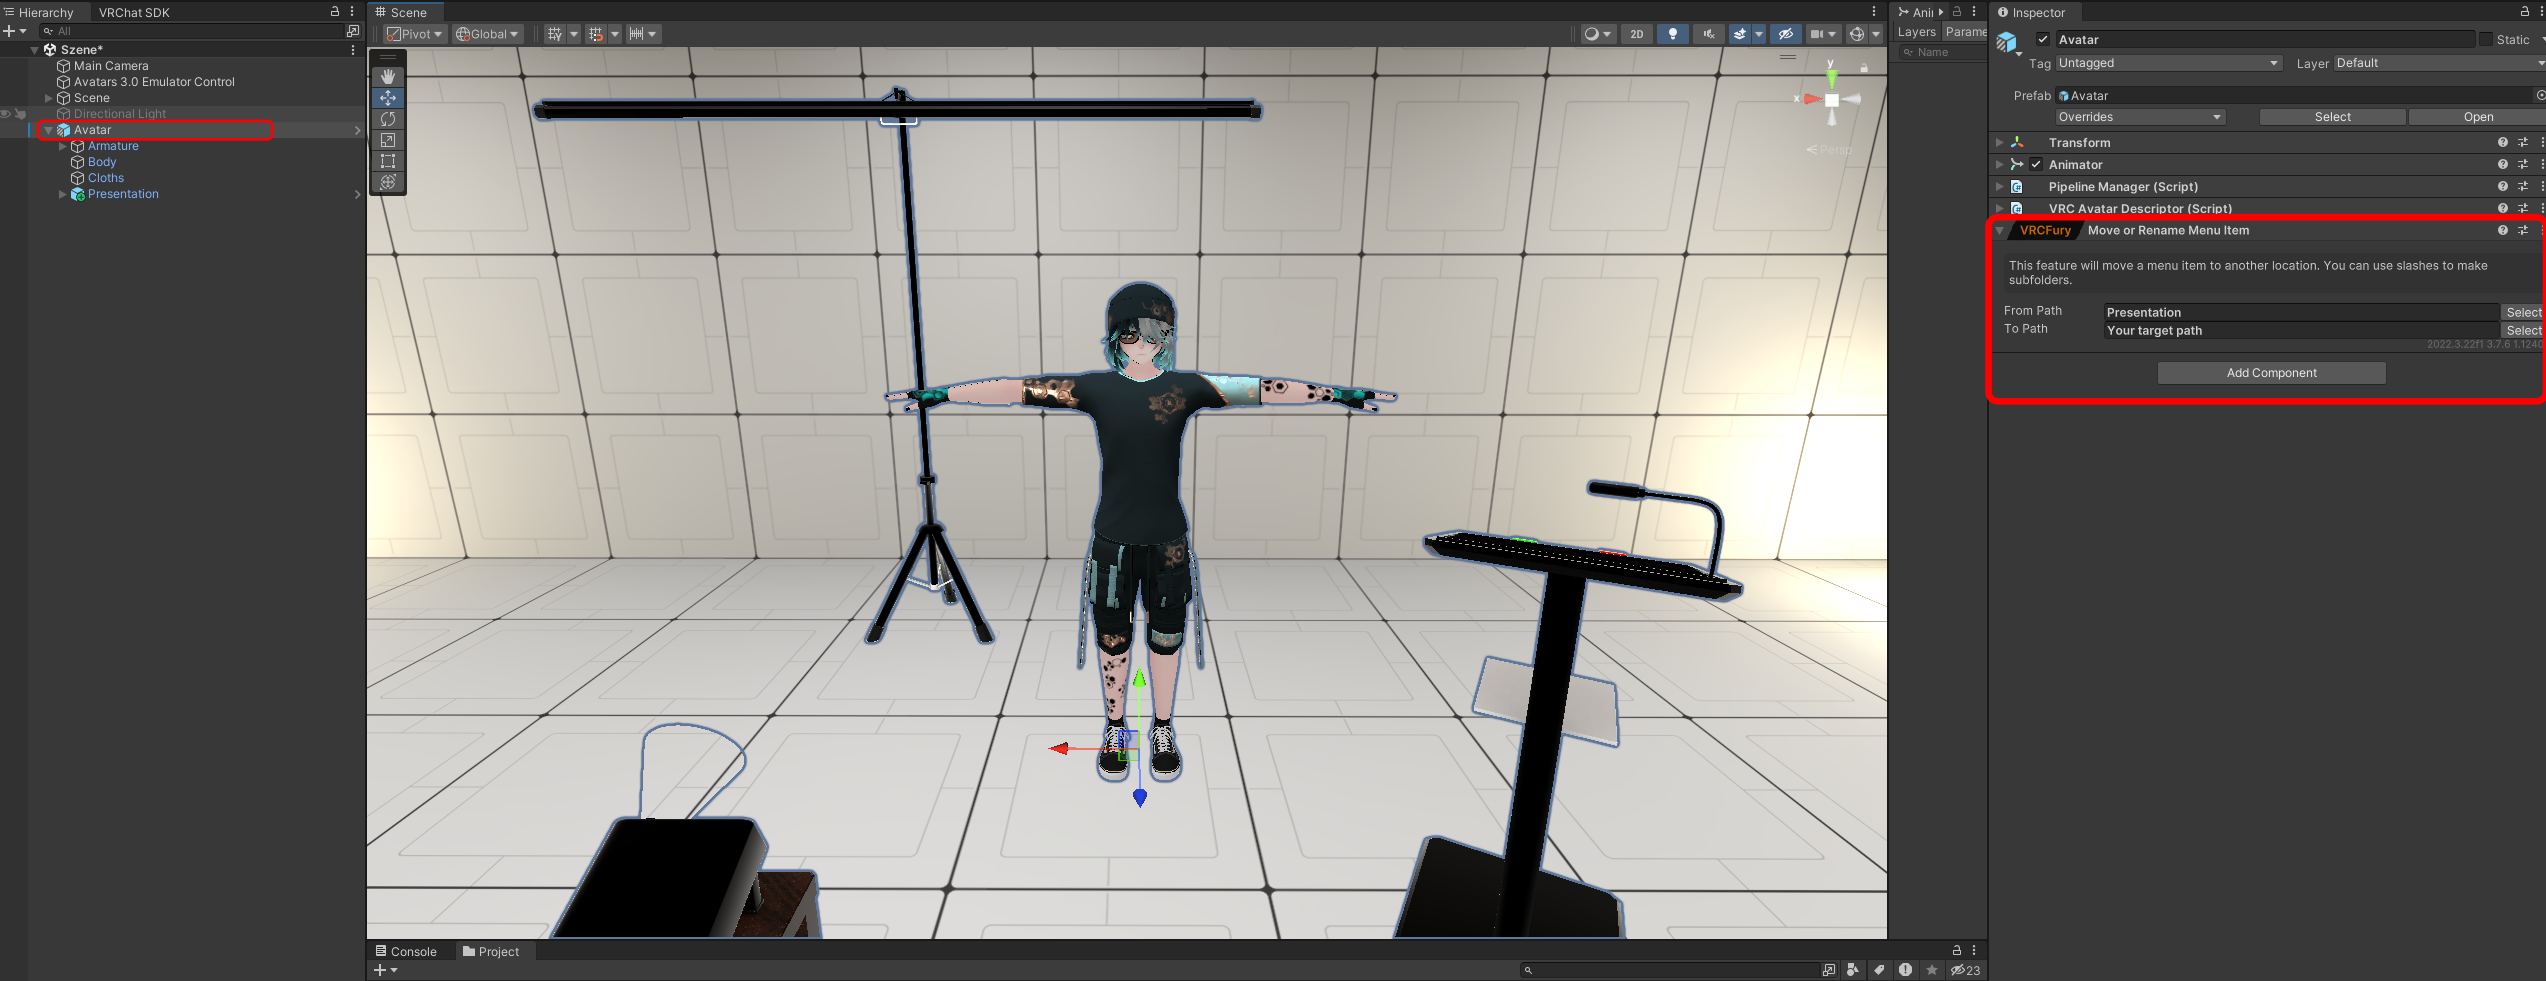
To move the expression menu of this asset to another location of your menu tree you can use the

"Move or rename menu item" component VRCFury offers. To add one, click on "Add component" in the inspector with your avatar selected.

Image

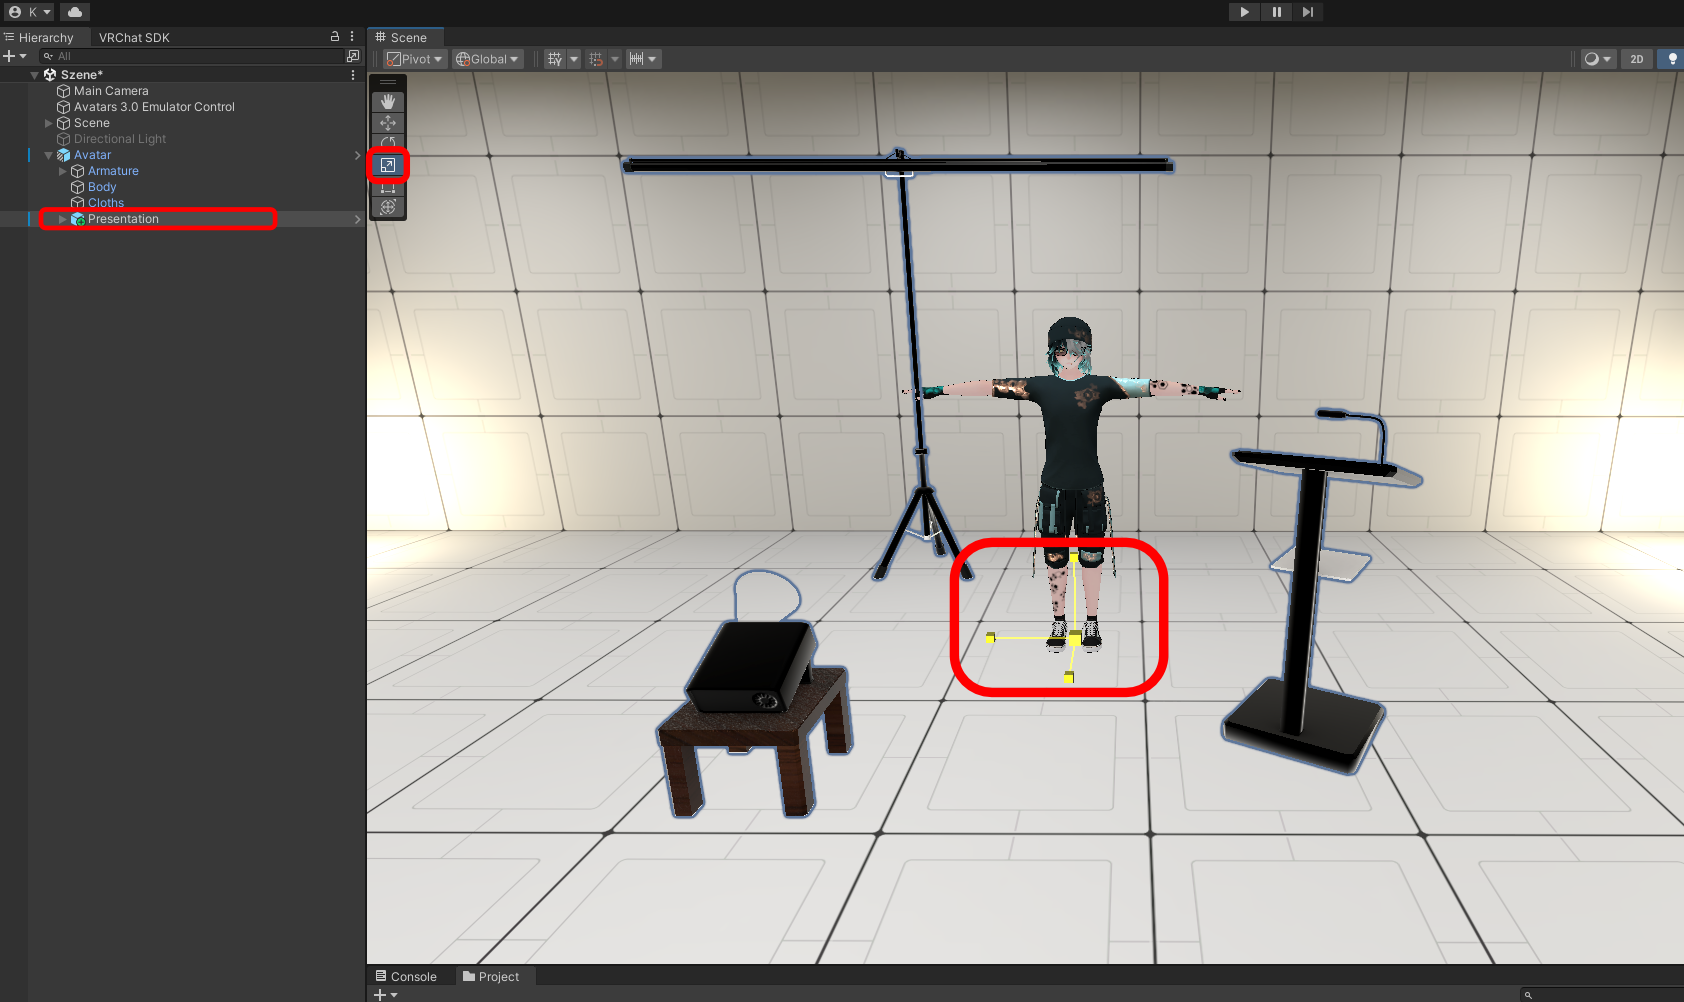
If you need to scale the asset, simply scale the Presentation prefab in the hierarchy.

Image

That´s all for the installation using VRCFury.

If you want to hide the asset in the editor, select the "Presentation Setup" in the hierarchy and uncheck the top checkbox in the inspector on the right.

Image

You can now continue with adding your own slides.

Direct installation.

If you do not want to use VRCFury to add the prefab to your avatar you can use the Asset Installer (second unity package in the download). This will merge the animator layers, parameters and expression menus to your avatar directly and embed the asset´s parts into the avatar´s hierarchy in edit mode rather than at compile time (like VRCFury does). The installer can also uninstall the asset, as long as you do not modify the names of the layers or parameters.

To use the installer, drag the unity package (Asset Installer) into your project´s file explorer window like you did with the Presentation package in the beginning and click on import.

After Unity adding the tool, you should find it under Tools-\>Kokos-\>Asset Installer

Image

This will open the tool window.

Simply drop the presentation prefab found at "Assets/Kokos/AvatarAssets/Presentation" in the project´s file explorer onto the prefab field and your avatar from the hierarchy onto the avatar field. The tool will check all dependencies and will let you know, if something is missing.

Image

Image

Requirements
A list of all things that need to be in place for this prefab to work properly.

For the presentation you need a parameter file, at least one menu, an fx controller, poiyomi shaders, and two anchor points on your avatar where the asset parts are added to.

Anchor Points
Make sure your avatar´s root is in both fields (the root is the game object in the hierarchy with the Avatar Descriptor).

Image

Write Defaults
If your avatar uses write defaults make sure, the checkbox is checked.

Menu
With the dropdown in the menu section, you can pick the menu where the presentation menu will be added as a submenu to. That´s a lot of menus.

If everything is set up click Verify and then Add asset to avatar.

After the installation, the layout of the lower section of the tool should change into this

Image

By clicking on "Scaling" the cursor in the 3D view switches to the scaling cursor. If you need to rescale the asset to fit your avatar´s size, use this mode.

Image

Click the Scaling button again, when you are done to exit the scaling mode.

The same goes for the "Positioning". This defines the spawn location of the asset. Since you likely will use the "Freeze" toggle in the menu in-game to lock the asset in place, the positioning does not have a real purpose for this asset.

Note

If moving the arrow- thingy in the scene window while having the positioning mode active does not do anything, it´s likely that the constraint source broke. This can be the case when using Unity 2022.3.6f1. To fix this problem, click on "Presentation Setup" in the hierarchy (in the root of your avatar). Then in the inspector, the parent constraint should have the anchor point as source.

Image

If this is not the case for you, drag and drop the "Presentation Anchor Point" from the hierarchy into this field. Then the positioning mode should work again. This issue is only affecting the positioning setup. It should have no impact on the functionality of the asset itself. Should you still have troubles, feel free to reach out.

When you´re done, you can click the "Hide Asset in editor" button and the tool will hide all visible elements of the asset.

Removal

Should you want to remove the asset from your avatar at a later point, simply drag and drop the avatar and the prefab into the two top fields again. If the asset is already added to the avatar and you haven't modified the parameter/layer/object names, it will give you the option to remove everything.

Whenever you install an asset using this tool, two folders are created in the "Generated files" folder.

Image

"Pre add" contains backups of all modified files of your avatar before they were touched by the tool.

If something breaks, you can find the original assets of your avatar in here.

The "REF" folder holds the files generated from the asset´s contents which are adjusted to your avatar. Do NOT remove the REF folder since the functionality relies on those files. It will be deleted automatically if you use the Remove asset from avatar function (red button).

Next, I will show you how to add your own slides.

Adding your own slides

To add your own slides, use the "Mask.png" located in the "Textures" folder in your download to arrange the slide content. Everything in the top box is displayed on the small screen and everything on the large box will be on the projection screen.

ImageStep 2

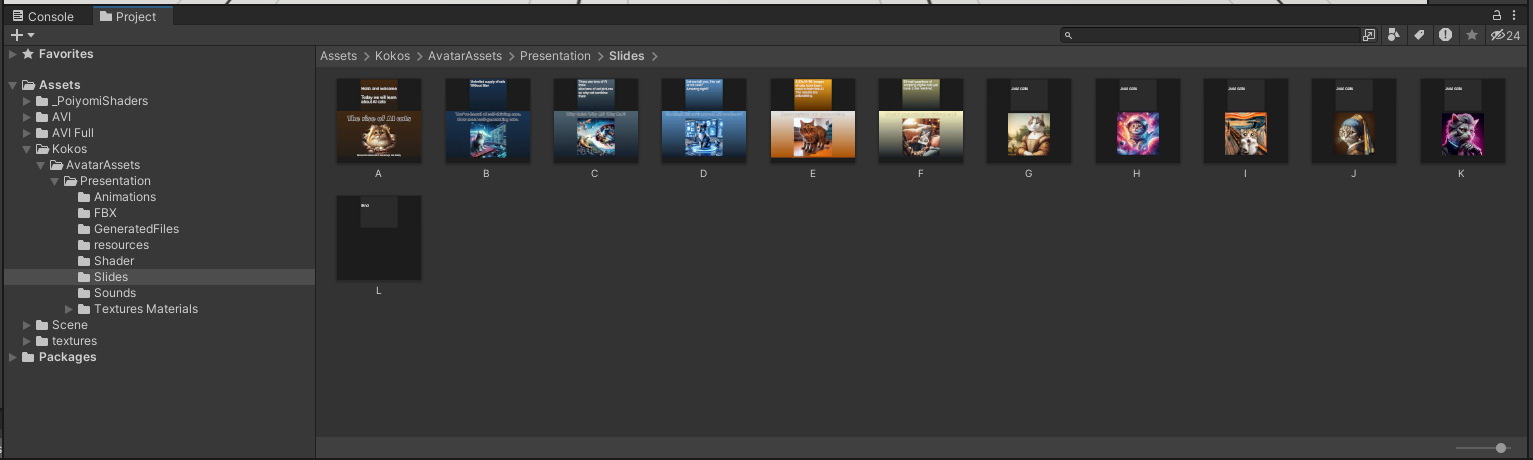
You can create your slides in any photo editor of your choice or even Power Point. When finished make sure you name them with letters instead of numbers (just a tip). Alphabetic sorting with numbers will end up with the slides being sorted like this in the flipbook: 1, 10, 11, 12, 2, 3, 4...

Drag your slide images (use png as the file format) into your unity project. You can create a subfolder in the slides directory , to keep things organized.

Image

info

Keep in mind: Use the minimum texture resolution possible, 1k should do fine for most presentations. Flipbooks can get quite large in file size.

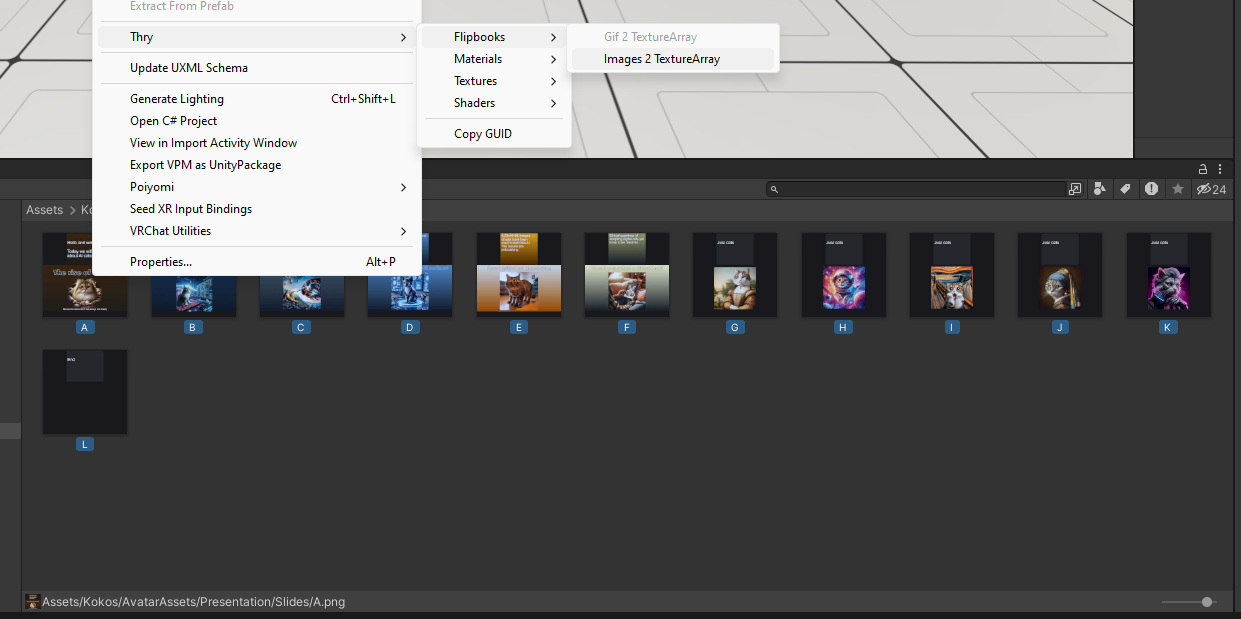
Next, select all the slides, then right click "Thry->Flipbooks->Images 2 Texture Array".

The "Thry" context menu entry should be added with the Poiyomi shader. This will create your flipbook, which you now need to add to the material.

Image

Note

In rare cases Thry´s tool can fail and cause random frames in the flipbook to become black.
In this case you should use an external tool to create a *.gif file and import it in your project. Then drop the gif into the flipbook slot as shown below. Unity is then using it´s internal convertor to create a flipbook.

Next, click on "Textures Materials" in the file browser, then select the "Presentation" material (unlock the shader, if it´s locked).

Image

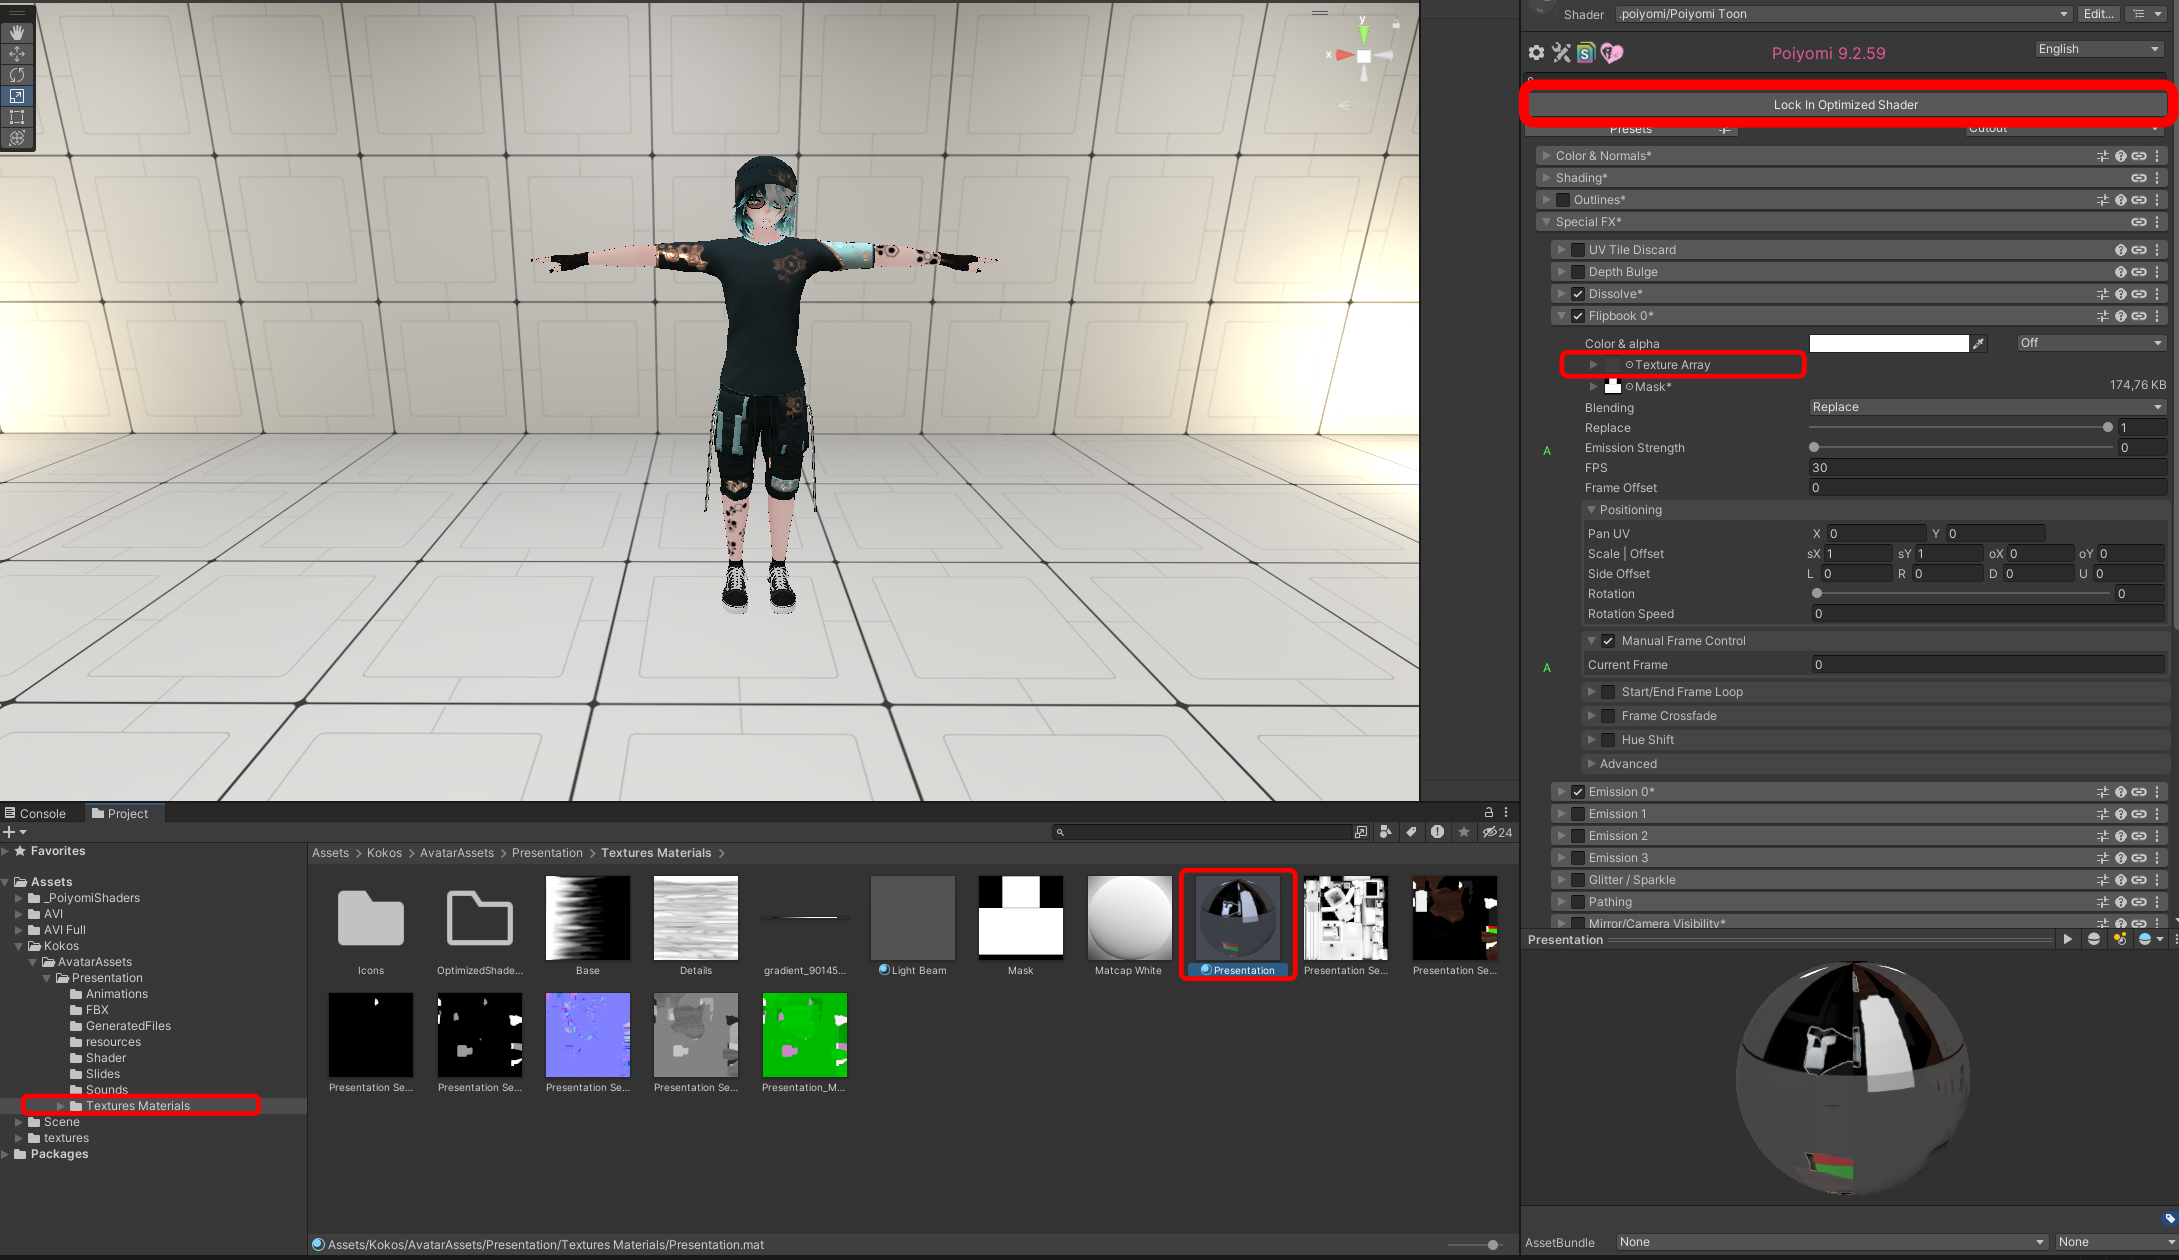
Then open the folder with your flipbook and drag it into the flipbook field in the material.
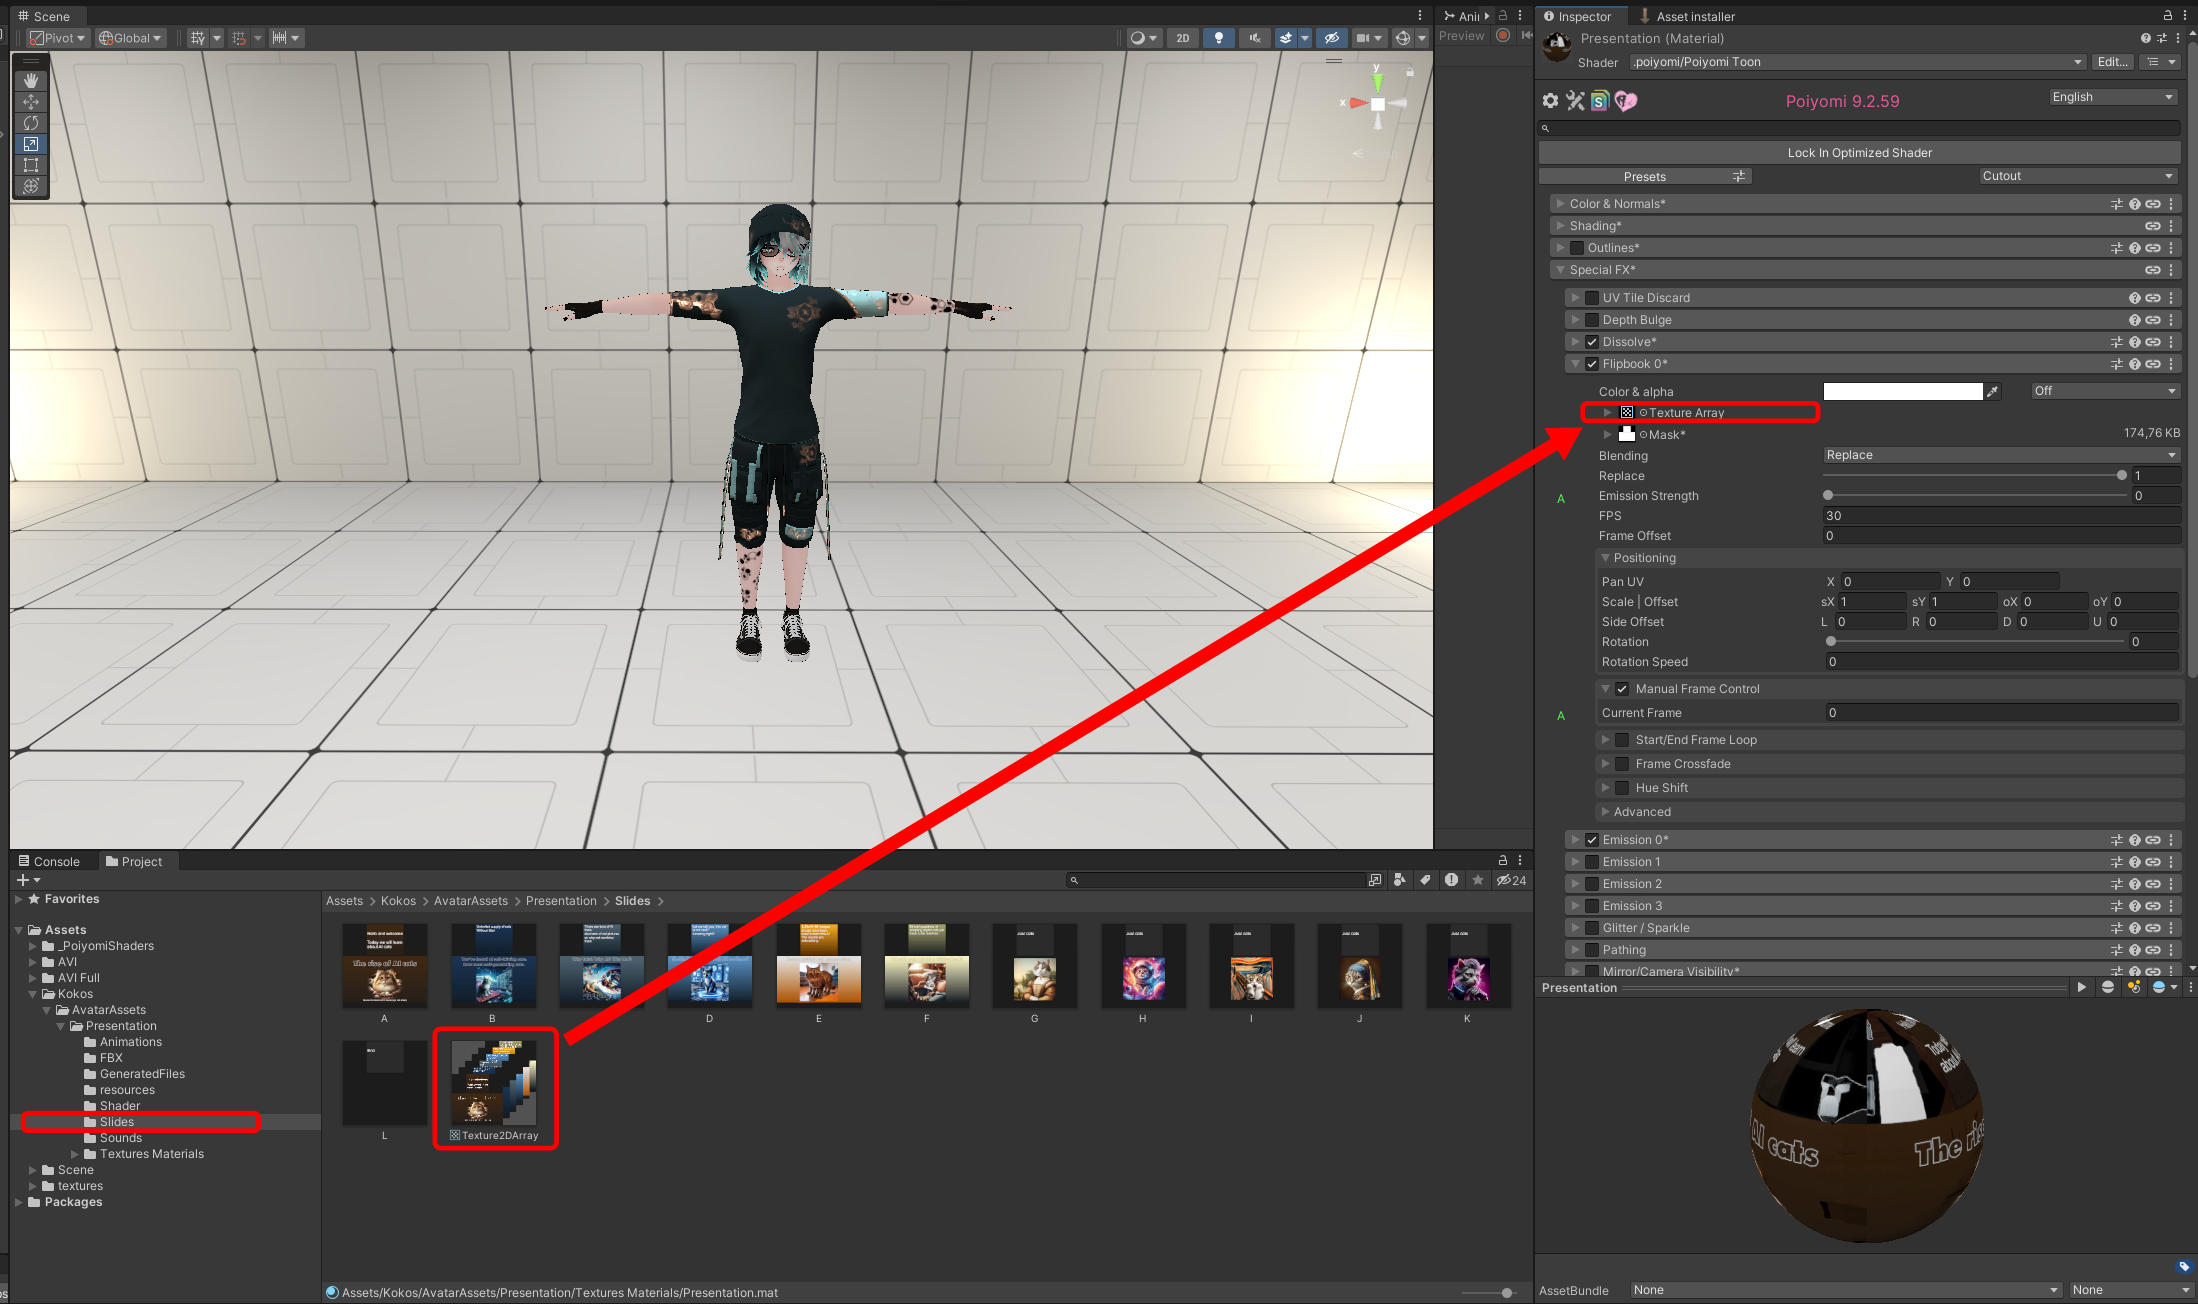
Image

That´s it.

If you have an avatar emulator installed in your project you can jump into play mode and test everything. The asset is designed in a way that it supports interactions through the action menu as well as through dragging the projection screen down and using the buttons on the table.

The next section is about changing the maximum number of slides. If you are using less than 12 it´s rather easy to adjust the logic (it is also optional in this case). If you have more than 12 it will be more complicated.